


计算溶液所需的质量、体积或浓度。
为什么选择此级别
,适用于对基线干扰要求严格的色谱和分析工作流程。
储存与运输
-20°C储存,避免反复冻融。超低温运输 。请查阅批次 COA 获取详细规格。
质量文档
SDS、COA、产品数据表及规格说明书均可下载。可通过批号查询获取批次 COA。
文献证明
在色谱分析、有机合成和交叉偶联反应领域已被 0 篇同行评审文献引用。
概述
|
产品简介
本试剂盒同时适用于Illumina及MGI测序平台,提供了DNA文库构建中DNA末端修
复、5’端磷酸化修饰、3’端加A和Adaptor连接所需的预混酶模块,搭配不同测序平台接
头引物试剂盒可以将DNA制备成Illumina或MGI测序平台专用的DNA文库。采用高保真
DNA聚合酶进行文库富集,无偏好的PCR扩增,扩大了序列的覆盖区域,可制备高质
量的DNA文库。试剂盒中提供的所有试剂都经过严格的质量控制和功能验证,最大程
度上保证了文库构建的稳定性。
产品特点
1.末端补平,磷酸化,加A一步完成。
2.末端修复后无需纯化,直接加接头。
3.超保真扩增,最大程度上降低了扩增偏好性
4.所得文库适用于多个测序平台:
MGI测序平台:MGISEQ-2000、MGISEQ-200、BGISEQ-500等MGI平台测序仪Illumina测序平台:Illumina GAllx,HiSacnSQ、HiSeq 2500/2000/1000、MiSeqsequencing等Illumina平台测序仪。
5.适用于物理打断后的gDNA建库及cfDNA建库。
自备仪器、试剂和耗材
1. 磁力架:建议使用DynaMagTM-2。
2.
无水乙醇(100%乙醇,分析纯):去离子水(pH 在7.0-8.0之间)。
3.接头引物试剂盒:
MGI平台
umina平台:illumina二代测序接头引物试剂盒
4.DNA纯化回收试剂盒:建议磁珠法DNA纯化回收试剂盒
5.反应管:建议使用低吸附的PCR管与1.5 ml离心管;枪头:建议使用高质量过滤枪头,防止试剂盒、文库样本污染。
实验前准备及注意事项
1.为了避免试剂反复冻融影响文库产量,建议在首次使用时进行分装保存。
2.PCR产物因操作不当极易产生污染,导致实验结果不准确,建议将PCR反应体系配制区与PCR产物纯化区隔离,并使用专门的移液器,定期对各实验区域进行清洁。
3.样本准备
·DNA 样本的片段大小应范围集中:打断产物片段较为弥散时可进行磁珠双选。·本试剂盒推荐建库循环数依据投入量不同进行调整,具体方案请参考各平台说明书
·cfDNA投入量需大于1ng。
4
试剂准备
.·取出试剂盒内对应试剂,短暂离心,酶混合液置于冰上待用:缓冲液使用前需在室温溶解后震荡离心,置于冰上待用,去离子水置于室温待用:请在冰上配制混合液。·试剂盒内缓冲液冰冻溶解后可能出现沉淀,沉淀不影响试剂功能,请充分震荡混匀直至沉淀消失后使用。
DNA建库流程示意图

Illumina平台DNA文库构建操作方案
* 请在实验前仔细阅读本操作说明, 根据使用测序平台类型选择操作方案
1 样本处理
1.1 样本要求
本试剂盒适用于所有动物、植物、细菌等物种样本提取的基因组DNA进行文库制 备。建议使用完整度较好,A260/A280=1.8~2.0的高质量基因组DNA进行打断。如果 物理打断后的样本DNA分布集中、纯度高,可直接进行末端修复,接头连接产物使用 完全回收的方案。如果打断产物较为弥散,需进行片段筛选,具体方案参见2.1
1.2 DNA打断方法和片段筛选
1.2.1打断
请将基因组DNA打断至所需主带范围,根据不同Covairs型号设置相应打断参数。
1.2.2 片段筛选
打断后DNA分布范围较宽,通常需要进行片段筛选以控制最终文库片段集中度。 推荐使用磁珠片段筛选方案(表1),也可通过切胶纯化的方式进行片段筛选。
表1 获取不同DNA主带时磁珠建议用量(100 μl反应体系)
|
注意:DNA片段选择性回收是可选步骤,进行磁珠片段筛选,DNA损失量约为60-95%。若打断产物片 段较为集中,可直接建库。起始样本量低于50ng,不建议进行DNA片段选择性回收。另外构建不同大小 的DNA文库时,DNA片段选择性回收的磁珠使用量不同,具体磁珠用量可参照表1(若使用除以 外厂家的磁珠,需自行摸索最佳磁珠用量)。
以下操作步骤中,可选择回收DNA片段长度峰值为210 bp,反应起始体积为100 μl, 不足100 μl用去离子水补平。
1.CMPure使用前需室温静置30 min,涡旋振荡CMPure20 s,使其彻底混匀为均一 溶液。
2.向打断体系中加入去离子水,使反应体积补充至100 μl。
3.将上述反应体系转移至一新的1.5 ml离心管中。
4.加入100 μl混合均匀的CMPure,涡旋震荡5 s后, 室温静置5 min。
5.短暂离心,将离心管置于磁力架上,使磁珠和上清溶液分离,直至溶液澄清(约需 5 min),小心地将上清溶液转移至新的1.5 ml离心管中,并弃去磁珠。 注意:不要弃除上清。
6.向上清中加入50 μl混合均匀的CMPure,涡旋震荡5 s后室温放置5 min。
7.短暂离心,将离心管放于磁力架上,使磁珠和上清溶液分离,直至溶液澄清(约需 5 min),小心吸取上清并弃除,期间避免接触已结合目标DNA的磁珠。 注意:不要弃除磁珠。
8.继续保持离心管固定于磁力架上,向离心管中加入250 μl新配置的80%乙醇,室温 放置30 s,待悬起的磁珠完全吸附后,小心弃除上清。
9.重复步骤8。
10.保持离心管固定于磁力架上,室温静置10 min,使磁珠在空气中干燥。
11.将离心管从磁力架上取下,加入46 μl去离子水(自备),涡旋振荡使磁珠完全重悬 于洗脱液中,室温静置5 min。
12.短暂离心,将离心管放于磁力架上直至溶液澄清(约需5 min),将43 μl洗脱液转 移至一个新的PCR管中,用于下游末端修复使用。
注意:一定不要转移磁珠,微量磁珠污染可影响后续DNA文库构建的正常进行。
1.3 建库样本DNA的定量和质控
建库样本DNA指末端修复步骤中的DNA,本试剂盒兼容cfDNA及物理打断后的 gDNA,样本DNA量范围为0.5-1 μg,体积≤43 μl。
应尽可能保证建库样本DNA片段集中,片段越集中,测序质量越好;反之测序质 量会有所下降。
2 文库构建流程
2.1 样本筛选方案
关于建库样本DNA: 如果物理打断后的样本DNA分布集中、纯度高,可直接进行末 端修复,接头连接产物使用完全回收的方案。如果物理打断后的样本DNA分布范围较 宽,通常需要进行长度分选。推荐使用磁珠双选的方案,也可通过切胶纯化的方式进 行分选。
长度分选执行位置有两种选择:
Ⅰ末端修复之前:磁珠双选流程可参考1.2物理打断及磁珠双选,磁珠用量可参考表1。 本方案适用于投入量充足且纯度差的样本。
Ⅱ接头连接之后:磁珠双选流程可参考1.2物理打断及磁珠双选,磁珠用量可参考表
6。本方案适用于投入量充足且纯度高的样本。
注意:保证双选步骤的唯一性,进行两次双选会导致文库质量严重下降,当样本投入量低于50 ng时不 建议进行磁珠双选。
2.2 末端修复
2.2.1 根据样本浓度,取适量样本(推荐100 ng)至新的PCR管中,并补充去离子水 至总体积为43 μl(见表2)。每批次建库可加入DNA Control作为建库质控品, DNA Control取样量为2 μl,并补充41 μl的去离子水至总体系为43 μl,在PCR管 中配制如下末端修复反应混合液:
表2 末端修复反应液的配制
|
2.2.2 震荡混匀5 s,瞬时离心将反应液收集至管底,确保反应液中没有气泡;
2.2.3 将含有上一步反应混合液的PCR管置于PCR仪上,按如下条件反应:
表3 末端修复反应条件
|
2.3 接头连接
构建Illumina测序平台的DNA文库,推荐使用二代测序多样本接头引物试 剂盒 I/II (Illumina平台)
2.3.1 向上述已完成DNA末端修复的反应液中直接加入以下反应混合液
表4 接头连接反应混合液的配制
|
注意:
1.若建库样本投入量低于50ng,请将Adaptor for Illumina用去离子水10倍稀释后使用。
2.震荡混匀5 s,请保证混匀充分,瞬时离心将反应液收集至管底;
3.将含有上一步反应液的PCR管置于PCR仪上,按照下表的条件进行反应:
表5 接头连接反应程序
|
2.4 连接产物纯化
连接产物纯化有两种方案,选择性回收和完全回收。若起始样本量低于50 ng或使 用磁珠双选后的打断产物,此步建议选择方案二(DNA片段完全回收);若使用未经 双选的打断产物,建议选择方案一(DNA片段选择回收)。
方案一、DNA片段选择回收 操作流程参考1.2.2 片段筛选,双选磁珠用量可参考表6。
表6 获取DNA主带时磁珠建议用量(100 μl反应体系)
|
方案二、DNA片段完全回收
1.提前30 min 取出 CMPure磁珠置于室温,使用前充分震荡混匀;
2.吸取80 μlCMPure至80 μl连接产物中,震荡混匀5 s,室温孵育5 min;
3.瞬时离心,将离心管置于磁力架,静置5 min至液体澄清,移液器吸取并弃掉上清;
4.保持离心管固定于磁力架上,加入250 μl新鲜配制的80%乙醇,待悬起的磁珠完全 吸附后彻底弃去乙醇(1 min左右);
5.重复步骤4一次,最后一次尽量吸干管底液体,有少量残留在管壁时可将离心管瞬 时离心,在磁力架上分离后,用小量程的移液器把管底液体吸干;
注意:不要吸取磁珠,以免影响产量。
6.保持离心管固定于磁力架上,打开离心管管盖,室温干燥5~6 min,直至磁珠无反 光、无开裂;
7.将离心管从磁力架上取下,加入25 μl去离子水进行DNA 洗脱,震荡混匀5 s,室温 下溶解5 min;
8.瞬时离心,将离心管置于磁力架上,静置5 min至液体澄清,将23 μl上清液全部转 移到新的PCR 管中,进行PCR扩增反应反应或者-20℃保存。
2.5 PCR扩增
2.5.1 参考表7配制PCR反应混合液,建议使用Illumina测序平台二代测序多 样本接头引物试剂盒 I/II
表7 PCR扩增反应混合液的配制
|
注意:本试剂盒提供足量的2×PCR Mix,在控制循环数的基础上提高出库量,可选择100 μl的PCR扩 增体系。
2.5.2 震荡混匀5 s,瞬时离心,将反应液收集至管底。
2.5.3 将上述PCR 管置于PCR 仪上,按照下表的条件进行反应
表8 PCR反应程序
表9 获取100 ng和1 μg文库推荐的扩增循环数
|
注意:
1 若样本DNA于末端修复前进行的磁珠双选可参考最低循环数;若在接头连接后进行的磁珠双选,则 参考最高循环数。
2 FFPE样本质量较差,可在推荐最高循环数的基础上增加3个循环。
3 *当接头连接时使用完整长度的Adaptor,且文库产出满足应用要求时,可不进行PCR扩增步骤,直 接获取PCR-Free文库;若使用的是不完整接头,需进行1-3轮PCR扩增,以获取测序所需的完整接头 序列。
4 样本类型为cfDNA时,PCR循环数大于等于12。
5 DNA Control 循环数设为7。
2.6 PCR产物纯化
1.提前30 min取出CMPure置于室温,使用前充分震荡混匀;
2.加入1倍体积的 CMPure至PCR 产物中,震荡混匀5 s,室温孵育5 min;
3.瞬时离心,将离心管置于磁力架,静置5 min至液体澄清,移液器吸取并弃掉上清;
4.保持离心管固定于磁力架上,加入250 μl新鲜配制的80%乙醇,待悬起的磁珠完 全 吸附后彻底弃去乙醇(1 min左右);
5.重复步骤4一次,最后一次尽量吸干管底液体,有少量残留在管壁时可将离心管瞬 时离心,在磁力架上分离后,用小量程的移液器把管底液体吸干; 注意:不要吸取磁珠,以免影响产量。
6.保持离心管固定于磁力架上,打开离心管管盖,室温干燥5~6 min,直至磁珠无反 光、无开裂;
7.将离心管从磁力架上取下,加入32 μl去离子水进行DNA 洗脱,震荡混匀5 s,室温 下溶解5 min;
8.瞬时离心,将离心管置于磁力架上,静置5 min至液体澄清,将30 μl上清液转移到 新的1.5 ml离心管中,进行上机测试或者-20℃保存。
2.7 文库的质量控制
通常情况下,构建好的文库需要进行文库浓度及长度分布检测。 文库浓度测定:推荐使用荧光染料法(Qubit或Picogreen)或qPCR绝对定量法进 行文库浓度测定。 文库长度分布检测:通过Agilent 2100 Bioanalyzer;LabChip GXll Touch微流控毛 细管电泳等设备进行长度分布检测。

图: DNA文库快速制备试剂盒构建Illumina测序平台DNA文库, 建库过程中各步骤产物的长度分布检测。
MGI 平台DNA文库构建操作方案
* 请在实验前仔细阅读本操作说明, 根据使用测序平台类型选择操作方案
1 样本处理
1.1 样本要求
本试剂盒适用于所有动物、植物、细菌等物种样本提取的基因组DNA进行文库制 备。建议使用完整度较好,A260/A280=1.8~2.0的高质量基因组DNA进行打断。如果 物理打断后的样本DNA分布集中、纯度高,可直接进行末端修复,接头连接产物使用 完全回收的方案。如果打断产物较为弥散,需进行片段筛选,具体方案参见1.2。
1.2 DNA打断方法和片段筛选
1.2.1打断
请将基因组DNA打断至所需主带范围,根据不同Covairs型号设置相应打断参数。
1.2.2 片段筛选
打断后DNA分布范围较宽,通常需要进行片段筛选以控制最终文库片段集中度。 推荐使用磁珠片段筛选方案(表1),也可通过切胶纯化的方式进行片段筛选。
表1 获取不同DNA主带时磁珠建议用量(100 μl反应体系)
|
注意:DNA片段选择性回收是可选步骤,进行磁珠片段筛选,DNA损失量约为60-95%。若打断产物片 段较为集中,可直接建库。起始样本量低于50ng,不建议进行DNA片段选择性回收。另外构建不同大小 的DNA文库时,DNA片段选择性回收的磁珠使用量不同,具体磁珠用量可参照表1(若使用除以 外厂家的磁珠,需自行摸索最佳磁珠用量)。
以下操作步骤中,可选择回收DNA片段长度峰值为210 bp,反应起始体积为100 μl, 不足100 μl用去离子水补平。
1.CMPure使用前需室温静置30 min,涡旋振荡CMPure20 s,使其彻底混匀为均一 溶液;
2.向打断体系中加入去离子水,使反应体积补充至100 μl;
3.将上述反应体系转移至一新的1.5 ml离心管中;
4.加入100 μl混合均匀的CMPure,涡旋震荡5 s后, 室温静置5 min;
5.短暂离心,将离心管置于磁力架上,使磁珠和上清溶液分离,直至溶液澄清(约需 5 min),小心地将上清溶液转移至新的1.5 ml离心管中,并弃去磁珠; 注意:不要弃除上清。
6.向上清中加入50 μl混合均匀的CMPure,涡旋震荡5 s后室温放置5 min;
7.短暂离心,将离心管放于磁力架上,使磁珠和上清溶液分离,直至溶液澄清(约需 5 min),小心吸取上清并弃除,期间避免接触已结合目标DNA的磁珠; 注意:不要弃除磁珠。
8.继续保持离心管固定于磁力架上,向离心管中加入250 μl新配置的80%乙醇,室温 放置30 s,待悬起的磁珠完全吸附后,小心弃除上清;
9.重复步骤8;
10.保持离心管固定于磁力架上,室温静置10 min,使磁珠在空气中干燥;
11.将离心管从磁力架上取下,加入46 μl去离子水(自备),涡旋振荡使磁珠完全重悬 于洗脱液中,室温静置5 min;
12. 短暂离心,将离心管放于磁力架上直至溶液澄清(约需5 min),将43 μl洗脱液转 移至一个新的PCR管中,用于下游末端修复使用。
注意:一定不要转移磁珠,微量磁珠污染可影响后续DNA文库构建的正常进行。
1.3 建库样本DNA的定量和质控
建库样本DNA指末端修复步骤中的DNA,本试剂盒兼容样本DNA量范围为 0.1-1000 ng,体积≤ 43 μl。 应尽可能保证建库样本DNA片段集中,片段越集中,测序质量越好;反之测序质 量会有所下降。
2 文库构建流程
关于建库样本DNA:如果物理打断后的样本DNA分布集中、纯度高,可直接进行 末端修复,接头连接产物使用完全回收的方案。如果物理打断后的样本DNA分布范围 较宽,通常需要进行长度分选。推荐使用磁珠双选的方案,也可通过切胶纯化的方式 进行分选。磁珠双选方案参考1.2。
2.1 末端修复
2.1.1 根据样本浓度,取适量样本(推荐100 ng)至新的PCR管中,并补充去离子水 至总体积为43 μl(见表2)。每批次建库可加入DNA Control作为建库质控品, DNA Control取样量为2 μl,并补充41 μl的去离子水至总体系为43 μl,在PCR管 中配制如下末端修复反应混合液:
表2 末端修复反应液的配制
|
2.1.2 震荡混匀5 s,瞬时离心将反应液收集至管底,确保反应液中没有气泡;
2.1.3 将含有上一步反应混合液的PCR管置于PCR仪上,按如下条件反应:
表3 末端修复反应条件
|
2.2 接头连接
建议使用二代测序多样本接头引物试剂盒Ⅰ、Ⅱ或Ⅲ
2.2.1 向上述已完成DNA末端修复的反应液中直接加入以下反应混合液
表4 接头连接反应混合液的配制
|
注意:1.若建库样本投入量低于50 ng,请将Adaptor for MGI用去离子水5倍稀释后使用。 2.震荡混匀5 s,请保证混匀充分,瞬时离心将反应液收集至管底; 3.将连接反应体系置于PCR仪上,按照下表的条件进行反应:
表5 接头连接反应程序
|
2.3 连接产物纯化
1.提前30 min取出CMPure磁珠置于室温,使用前充分震荡混匀;
2.吸取1倍体积(80 μl)CMPure至80 μl连接产物中,震荡混匀5 s,室温孵育5 min;
3.瞬时离心,将离心管置于磁力架,静置5 min至液体澄清,移液器吸取并弃掉上清;
4.保持离心管固定于磁力架上,加入250 μl新鲜配制的80%乙醇,待悬起的磁珠完全 吸附后彻底弃去乙醇(1 min左右);
5.重复步骤4一次,最后一次尽量吸干管底液体,有少量残留在管壁时可将离心管瞬 时离心,在磁力架上分离后,用小量程的移液器把管底液体吸干; 注意:不要吸取磁珠,以免影响产量。
6.保持离心管固定于磁力架上,打开离心管管盖,室温干燥5~6 min,直至磁珠无反 光、无开裂;
7.将离心管从磁力架上取下,加入46 μl去离子水进行DNA洗脱,震荡混匀5 s,室温 下溶解5 min;
8.瞬时离心,将离心管置于磁力架上,静置5 min至液体澄清,将44 μl上清液全部转 移到新的PCR 管中,进行下一步反应或者-20℃保存。
2.4 PCR扩增
2.4.1 配制PCR反应混合液(表6):向上一步的PCR管中加入6 μl Index Primer Mix (建议使用二代测序多样本接头引物试剂盒Ⅰ、Ⅱ或Ⅲ,每个样品中加入一种Index Primer Mix或一套Index Primer Mix,然后再加入50 μl 2×PCR Mix。
注意:Index Primer Mix是由Universal primer和Index primer配制而成,其中Index primer有 128种。可以根据不同混合测序策略,每个样品加入不同的Index,或一个样本加入一套Index; 要求最终混合后的文库保证所有Index都以套为单位凑齐。Index1-16中,4个为一套,共4套, 分别为1-4,5-8,9-12,13-16。Index17-128中,8个为一套,共14套,分别为17-24,25-32, 33-40,41-48,49-56,57-64,65-72,73-80,81-88,89-96,97-104,105-112,113-120及 121-128。
表6 PCR反应混合液的配制
|
2.震荡混匀5 s,瞬时离心将反应液收集至管底;
3.将上述PCR管置于PCR 仪上,按照下表的条件进行反应:
表7 PCR反应程序
|
表8 获取300 ng和1 μg文库推荐的扩增循环数
|
注意:
1 FFPE 样本质量较差,可在推荐最高循环数的基础上增加3个循环。 2 当DNA质量较差、文库较长时,可适当提高循环数以获取足量文库。 3 *当接头连接时使用完整长度的Adaptor,且文库产出满足应用要求时,可不进行PCR扩增步骤,直 接获取PCR-Free文库;若使用的是不完整接头,需进行1-3轮PCR扩增,以获取测序所需的完整接头 序列。 4 样本类型为cfDNA时,PCR循环数≥12。 5 DNA Control 循环数设为7。
2.5 PCR产物纯化
1.提前30 min取出CMPure置于室温,使用前充分震荡混匀;
2.加入1倍体积的 CMPure至PCR 产物中,震荡混匀5 s,室温孵育5 min;
3.瞬时离心,将离心管置于磁力架,静置5 min至液体澄清,移液器吸取并弃掉上清;
4.保持离心管固定于磁力架上,加入250 μl新鲜配制的80%乙醇,待悬起的磁珠完 全 吸附后彻底弃去乙醇(1 min左右);
5.重复步骤4一次,最后一次尽量吸干管底液体,有少量残留在管壁时可将离心管瞬 时离心,在磁力架上分离后,用小量程的移液器把管底液体吸干; 注意:不要吸取磁珠,以免影响产量。
6.保持离心管固定于磁力架上,打开离心管管盖,室温干燥5~6 min,直至磁珠无反 光、无开裂;
7.将离心管从磁力架上取下,加入32 μl去离子水进行DNA 洗脱,震荡混匀5 s,室温 下溶解5 min;
8.瞬时离心,将离心管置于磁力架上,静置5 min至液体澄清,将30 μl上清液转移到 新的1.5 ml离心管中,进行上机测试或者-20℃保存。
2.6 文库的质量控制
通常情况下,构建好的文库需要进行文库浓度及长度分布检测。 文库浓度测定:推荐使用荧光染料法(Qubit或Picogreen)或qPCR绝对定量法进 行文库浓度测定。 文库长度分布检测:通过Agilent 2100 Bioanalyzer;LabChip GXll Touch微流控毛 细管电泳等设备进行长度分布检测。

|
Products Introduction
This kit is suitable for both Illumina and MGI sequencing platforms. It provides pre-mixed enzyme modules for DNA end modification, 5'-end phosphorylation modification, 3'-end A-addition, and Adaptor ligation in DNA library construction, and it can be used with primer kits for different sequencing platforms to prepare DNA libraries specific for Illumina or MGI sequencing platforms. DNA libraries can be prepared for Illumina or MGI sequencing platforms by combining with primer kits for different sequencing platforms. The use of high-fidelity DNA polymerase for library enrichment and preference-free PCR amplification extends the coverage of the sequence and allows for the preparation of high-quality DNA libraries. All the reagents provided in the kit have been subjected to strict quality control and functional validation to maximize the stability of library construction.
Product Features
1. End flattening, phosphorylation, and addition of A in one step.
2. No need to purify after end repair, add joints directly.
3. Ultra-fidelity amplification minimizes amplification preference
4. The resulting libraries are suitable for multiple sequencing platforms.
MGI sequencing platform: MGISEQ-2000, MGISEQ-200, BGISEQ-500 and other MGI platform sequencers Illumina sequencing platform: Illumina Gallx, HiSacnSQ, HiSeq 2500/2000/1000, MiSeqsequencing and other Illumina platforms. platform sequencers.
5. Applicable to gDNA library and cfDNA library after physical interruption.
Provide your own instruments, reagents and consumables
1. Magnetic field: DynaMagTM-2 (Cat. No. 12321D) is recommended.
2. Anhydrous ethanol (100% ethanol, analytically pure): deionized water (pH between 7.0 and 8.0).
3. Junction primer kit.
MGI platform: Kang for MGI second-generation sequencing multi-sample junction primer kit II!IIumina platform: Kang for illumina second-generation sequencing junction primer kit W!
4. DNA purification and recovery kit: It is recommended to use the magnetic bead method for DNA purification and recovery kit.
5. Reaction tubes: it is recommended to use low adsorption PCR tubes and 1.5 ml centrifuge tubes; gun head: it is recommended to use high-quality filtration gun head to prevent contamination of reagent kits and library samples.
Pre-experiment preparation and precautions
1. In order to avoid repeated freezing and thawing of reagents affecting the library yield, it is recommended to store the reagents in portions at the time of first use.
2. PCR products are easily contaminated due to improper operation, resulting in inaccurate results, it is recommended to isolate the PCR reaction system preparation area from the PCR product purification area, and use special pipettes to clean each experimental area regularly.
3. Sample preparation
The fragment size of the DNA sample should be concentrated in a range: magnetic beads can be double-selected when the interrupting product fragments are more diffuse. -The recommended number of cycles for this kit is adjusted according to the input volume, please refer to the manual of each platform for the specific program.
-cfDNA input needs to be greater than 1ng.
4 Reagent preparation
Remove the corresponding reagents in the kit, centrifuge briefly, put the enzyme mixture on ice for use: buffer needs to be dissolved at room temperature before use, then shake and centrifuge, put it on ice for use, deionized water is put at room temperature for use: please prepare the mixture on ice. -The buffer in the kit may precipitate after dissolving on ice, the precipitate does not affect the function of the reagent, please shake and mix well until the precipitate disappears and then use the reagent.
Schematic diagram of DNA banking process

Illumina platform DNA library construction operation program
* Please read these instructions carefully before performing the experiment and select the protocol according to the type of sequencing platform to be used.
1 Sample processing
1.1 Sample requirements
This kit is suitable for library preparation of genomic DNA extracted from all animal, plant and bacterial species. It is recommended to use high-quality genomic DNA with good integrity and A260/A280=1.8~2.0 for interruption. If the DNA of the physically broken samples is concentrated and of high purity, end repair can be performed directly, and the splice products can be recovered completely. If the interrupted product is more dispersed, fragment screening is required, see 2.1 for the specific program.
1.2 DNA interruption methods and fragment screening
1.2.1 Interruptions
Please interrupt the genomic DNA to the desired primary band range and set the interruption parameters according to the different Covairs models.
1.2.2 Clip filtering
The wide distribution of DNA after interruption usually requires fragment screening to control the concentration of fragments in the final library. A magnetic bead fragment screening protocol is recommended (Table 1), and fragment screening can also be performed by cut-gel purification.
Table 1 Suggested amount of magnetic beads for obtaining different DNA backbands (100 μl reaction system)

Selective recovery of DNA fragments is recommended using the CombiVision Magnetic Bead DNA Purification and Recovery Kit.
Note: Selective recovery of DNA fragments is an optional step, and DNA loss is approximately 60-95% for magnetic bead fragment screening. If the interrupted fragments are concentrated, the library can be constructed directly. If the starting sample size is less than 50ng, selective recovery of DNA fragments is not recommended. In addition, the amount of magnetic beads used for selective recovery of DNA fragments is different for different sizes of DNA libraries. The specific amount of magnetic beads used can be found in Table 1 (if you use magnetic beads from manufacturers other than CombiVision, you need to find out the optimal amount of beads by yourself).
In the following steps, a peak length of 210 bp can be selected for the recovery of DNA fragments, and the starting volume of the reaction is 100 μl, with less than 100 μl made up with deionized water.
1. Before use, CMPure should be left at room temperature for 30 min, and then vortex shaken for 20 s to make it a homogeneous solution.
2. Add deionized water to the interrupting system to replenish the reaction volume to 100 μl.
3. Transfer the above reaction system to a new 1.5 ml centrifuge tube.
4. Add 100 μl of well-mixed CMPure, vortex and shake for 5 s, and leave for 5 min at room temperature.
5. Centrifuge briefly, place the tube on a magnetic rack to separate the beads from the supernatant solution until the solution is clear (about 5 min), carefully transfer the supernatant solution to a new 1.5 ml tube, and discard the beads.
Note: Do not discard the top clear.
6. Add 50 μl of well-mixed CMPure to the supernatant, vortex and shake for 5 s and leave for 5 min at room temperature.
7. Centrifuge the tube briefly on a magnetic rack to separate the beads from the supernatant solution until the solution is clear (about 5 min), carefully aspirate the supernatant and discard it, avoiding contact with the beads that have bound the target DNA.
Note: Do not discard the beads.
8. Keeping the centrifuge tube fixed on the magnetic rack, add 250 μl of freshly prepared 80% ethanol to the centrifuge tube and allow to stand at room temperature for 30 s. When the suspended beads are fully adsorbed, carefully discard the supernatant.
9. Repeat step 8.
10. Keep the centrifuge tube fixed on the magnetic rack and let it stand at room temperature for 10 min to allow the magnetic beads to dry in the air.
11. Remove the centrifuge tube from the magnetic rack, add 46 μl of deionized water (supplied), vortex to completely resuspend the beads in the eluent, and allow to stand at room temperature for 5 min.
12. Centrifuge briefly, place the tube on a magnetic rack until the solution is clear (about 5 min), and transfer 43 μl of eluate to a new PCR tube for downstream end-recovery use.
Note: Be sure not to transfer the magnetic beads; trace bead contamination can affect the proper performance of subsequent DNA library construction.
1.3 Quantification and quality control of DNA from constructed samples
Library sample DNA refers to the DNA in the end repair step, this kit is compatible with cfDNA and physically interrupted gDNA, the sample DNA amount ranges from 0.5-1 μg in a volume of ≤43 μl.
It should be ensured that the DNA fragments of the library samples are concentrated as much as possible; the more concentrated the fragments are, the better the sequencing quality will be; on the contrary, the sequencing quality will be reduced.
2 Library construction process
2.1 Sample Screening Program
For library sample DNA: If the sample DNA after physical interruption is well distributed and of high purity, it can be directly end-repaired, and the splice products can be fully recovered. If the DNA of the physically broken sample has a wide range of distribution, length sorting is usually required. Dual sorting with magnetic beads is recommended, but can also be performed by cutting and purification.
There are two options for the length sorting execution position:
Before Ⅰ end repair: the magnetic bead double-selection process can be referred to 1.2 Physical interruption and magnetic bead double-selection, and the magnetic bead dosage can be referred to Table 1. This scheme is suitable for samples with sufficient inputs and poor purity.
After Ⅱ connector connection: bead double selection process can refer to 1.2 Physical interruption and bead double selection, bead dosage can refer to the table
6. This program is suitable for samples with sufficient inputs and high purity.
Note: Ensure the uniqueness of the double-selection step, as double-selection twice will result in a severe degradation of the library quality, and bead double-selection is not recommended when the sample input is less than 50 ng.
2.2 End-of-pipe repair
2.2.1 According to the sample concentration, take an appropriate amount of sample (100 ng is recommended) into a new PCR tube and replenish with deionized water to a total volume of 43 μl (see Table 2). For each batch of library construction, DNA Control can be added as the library quality control, the sample volume of DNA Control is 2 μl, and 41 μl of deionized water should be added to a total volume of 43 μl, and the following end repair reaction mix should be prepared in the PCR tube:
Table 2 Formulation of end-repair reaction solution

2.2.2 Shake and mix for 5 s. Instantaneous centrifugation collects the reaction solution to the bottom of the tube, ensuring that there are no air bubbles in the reaction solution;
2.2.3 Place the PCR tube containing the reaction mixture from the previous step on the PCR instrument and react under the following conditions:
Table 3 End-repair reaction conditions

2.3 Joint connections
To construct DNA libraries for the Illumina sequencing platform, we recommend the use of CombiSense II Sequencing Multi-Sample Junction Primer Kit I/II (Illumina platform).
2.3.1 Add the following reaction mixture directly to the above reaction solution where DNA end repair has been completed
Table 4 Preparation of joint connection reaction mixture

Attention:
1. If the amount of sample input for library construction is less than 50ng, please dilute Adaptor for Illumina 10 times with deionized water and then use it.
2. Shake and mix for 5 s. Ensure adequate mixing and collect the reaction solution to the bottom of the tube by centrifugation;
3. Place the PCR tube containing the reaction solution from the previous step on the PCR instrument and perform the reaction according to the conditions in the table below:
Table 5 Connector Connection Reaction Procedure

2.4 Connection product purification
There are two options for ligation product purification, selective recovery and complete recovery. Option 2 (complete recovery of DNA fragments) is recommended if the starting sample size is less than 50 ng or if double-selected interruptions from magnetic beads are used; option 1 (selective recovery of DNA fragments) is recommended if non-double-selected interruptions are used.
Scheme I. DNA Fragment Selection and Recovery The operation procedure refers to 1.2.2 Fragment Screening, and the amount of double-selected magnetic beads can be referred to Table 6.
Table 6 Suggested amount of magnetic beads for obtaining DNA master bands (100 μl reaction system)

Scheme II. Complete recovery of DNA fragments
1. Remove the CMPure beads 30 min in advance and place at room temperature, shake well before use;
2. Pipette 80 μl of CMPure into 80 μl of ligated product, shake and mix for 5 s, incubate for 5 min at room temperature;
3. For instantaneous centrifugation, place the centrifuge tube on a magnetic rack and let it stand for 5 min until the liquid is clarified, pipette and discard the supernatant;
4. Keeping the centrifuge tube fixed on a magnetic rack, add 250 μl of freshly prepared 80% ethanol and discard the ethanol completely after the suspended beads are fully adsorbed (about 1 min);
5. Repeat step 4 once, the last time sucking up as much liquid as possible from the bottom of the tube. If a small amount remains on the wall of the tube, centrifuge the tube momentarily, separate it on a magnetic rack, and then suck up the liquid from the bottom of the tube with a small-volume pipette;
Note: Do not suck up the magnetic beads as this may affect the yield.
6. Keep the centrifuge tube fixed on the magnetic rack, open the cap of the centrifuge tube and dry at room temperature for 5~6 min until the beads are free of reflection and cracks;
7. Remove the centrifuge tube from the magnetic rack, add 25 μl of deionized water for DNA elution, shake and mix for 5 s, and dissolve for 5 min at room temperature;
8. Instantaneous centrifugation, place the centrifuge tube on a magnetic rack, let it stand for 5 min until the liquid is clarified, transfer all 23 μl of supernatant to a new PCR tube and carry out the PCR amplification reaction or store it at -20℃.
2.5 PCR amplification
2.5.1 Refer to Table 7 for the preparation of PCR reaction mix, and it is recommended to use CombiVision Illumina Sequencing Platform Second Generation Sequencing Multi-Sample Junction Primer Kit I/II.
Table 7 Preparation of PCR amplification reaction mixes

Note: This kit provides a sufficient amount of 2×PCR Mix to increase the amount of libraries while controlling the number of cycles, and 100 μl of PCR amplification system can be selected.
2.5.2 Shake and mix for 5 s. Centrifuge instantaneously and collect the reaction solution to the bottom of the tube.
2.5.3 Place the above PCR tubes on the PCR instrument and run the reaction according to the following conditions
Table 8 PCR reaction program

|
Note: The number of cycles should be adjusted according to the amount of starting DNA. The exact number of cycles can be found in Table 9.
Table 9 Recommended number of amplification cycles for obtaining 100 ng and 1 μg libraries

Attention:
1 Refer to the lowest number of cycles if the bead double-selection was performed before end-repair of the sample DNA, or the highest number of cycles if the bead double-selection was performed after junction attachment.
2 FFPE samples are of poor quality and can be increased by 3 cycles from the recommended maximum number of cycles.
3 *When a full-length Adaptor is used for junction ligation and the library output meets the application requirements, the PCR-Free library can be obtained directly without PCR amplification; if an incomplete Adaptor is used, 1-3 rounds of PCR amplification are required to obtain the complete Adaptor sequence required for sequencing.
4 The number of PCR cycles is greater than or equal to 12 when the sample type is cfDNA.
5 DNA Control The number of cycles is set to 7.
2.6 PCR product purification
1. Remove the CMPure 30 min in advance and place it at room temperature. Shake well before use;
2. Add 1x the volume of CMPure to the PCR product, shake for 5 s, and incubate for 5 min at room temperature;
3. For instantaneous centrifugation, place the centrifuge tube on a magnetic rack and let it stand for 5 min until the liquid is clarified, pipette and discard the supernatant;
4. Keeping the centrifuge tube fixed on a magnetic rack, add 250 μl of freshly prepared 80% ethanol and discard the ethanol completely after the suspended beads are fully adsorbed (about 1 min);
5. Repeat step 4 once, the last time try to suck up the liquid at the bottom of the tube, if there is a small amount of residue in the wall of the tube can be centrifuged instantly, after separation on the magnetic rack, use a small-volume pipette to suck up the liquid at the bottom of the tube; Note: Do not suck up the magnetic beads, so as not to affect the yield.
6. Keep the centrifuge tube fixed on the magnetic rack, open the cap of the centrifuge tube and dry at room temperature for 5~6 min until the beads are free of reflection and cracks;
7. Remove the centrifuge tube from the magnetic rack, add 32 μl of deionized water for DNA elution, shake and mix for 5 s, and dissolve for 5 min at room temperature;
8. Instantaneous centrifugation, place the centrifuge tube on a magnetic rack and let it stand for 5 min until the liquid is clarified, then transfer 30 μl of supernatant to a new 1.5 ml centrifuge tube for on-line testing or storage at -20℃.
2.7 Quality control of the library
Usually, the constructed library needs to be tested for library concentration and length distribution. Determination of library concentration: It is recommended to use fluorescent dye method (Qubit or Picogreen) or qPCR absolute quantitative method to determine the library concentration. Library length distribution: Agilent 2100 Bioanalyzer; LabChip GXll Touch microfluidic capillary electrophoresis and other equipment for length distribution detection.

Figure: DNA library construction on Illumina Sequencing Platform by DNA Library Rapid Preparation Kit, and the length distribution of the products in each step of the library construction process.
MGI platform DNA library construction operation program
* Please read these instructions carefully before performing the experiment and select the protocol according to the type of sequencing platform to be used.
1 Sample processing
1.1 Sample requirements
This kit is suitable for library preparation of genomic DNA extracted from all animal, plant and bacterial species. It is recommended to use high-quality genomic DNA with good integrity and A260/A280=1.8~2.0 for interruption. If the DNA of the physically broken samples is concentrated and of high purity, end repair can be performed directly, and the splice products can be recovered completely. If the interrupted product is more diffuse, fragment screening is required, see 1.2 for specific protocol.
1.2 DNA interruption methods and fragment screening
1.2.1 Interruptions
Please interrupt the genomic DNA to the desired primary band range and set the interruption parameters according to the different Covairs models.
1.2.2 Clip filtering
The wide distribution of DNA after interruption usually requires fragment screening to control the concentration of fragments in the final library. A magnetic bead fragment screening protocol is recommended (Table 1), and fragment screening can also be performed by cutting gel purification.
Table 1 Suggested amount of magnetic beads for obtaining different DNA backbands (100 μl reaction system)

Selective recovery of DNA fragments is recommended using the CombiVision Magnetic Bead DNA Purification and Recovery Kit.
Note: Selective recovery of DNA fragments is an optional step, and DNA loss is approximately 60-95% for magnetic bead fragment screening. If the interrupted fragments are concentrated, the library can be constructed directly. If the starting sample size is less than 50ng, selective recovery of DNA fragments is not recommended. In addition, the amount of magnetic beads used for selective recovery of DNA fragments is different for different sizes of DNA libraries, please refer to Table 1 for the specific amount of magnetic beads (if you use magnetic beads from manufacturers other than CombiVision, you need to find out the optimal amount of magnetic beads by yourself).
In the following steps, a peak length of 210 bp can be selected for the recovery of DNA fragments, and the starting volume of the reaction is 100 μl, with less than 100 μl made up with deionized water.
1. Before use, CMPure should be left at room temperature for 30 min, and vortex shaking CMPure for 20 s, so that it can be thoroughly mixed into a homogeneous solution;
2. Add deionized water to the interrupting system to replenish the reaction volume to 100 μl;
3. Transfer the above reaction system to a new 1.5 ml centrifuge tube;
4. Add 100 μl of well-mixed CMPure, vortex and shake for 5 s, and leave for 5 min at room temperature;
5. Centrifuge briefly, place the tube on a magnetic rack to separate the beads from the supernatant solution until the solution is clear (approximately 5 min), carefully transfer the supernatant solution to a new 1.5 ml centrifuge tube, and discard the beads; NOTE: Do not discard the supernatant.
6. Add 50 μl of well-mixed CMPure to the supernatant, vortex and shake for 5 s and leave for 5 min at room temperature;
7. Centrifuge briefly, place the tube on a magnetic rack to separate the beads from the supernatant solution until the solution is clear (about 5 min), carefully aspirate and discard the supernatant, avoiding contact with the beads that have bound the target DNA during this time; NOTE: Do not discard the beads.
8. Keeping the centrifuge tube fixed on the magnetic rack, add 250 μl of freshly prepared 80% ethanol to the centrifuge tube and allow to stand at room temperature for 30 s. When the suspended beads are fully adsorbed, carefully discard the supernatant;
9. Repeat step 8;
10. Keep the centrifuge tube fixed on the magnetic rack and let it stand at room temperature for 10 min to allow the magnetic beads to dry in the air;
11. Remove the centrifuge tube from the magnetic rack, add 46 μl of deionized water (supplied), vortex to completely resuspend the beads in the eluent, and allow to stand at room temperature for 5 min;
12. Centrifuge briefly, place the tube on a magnetic rack until the solution is clear (takes about 5 min), and transfer 43 μl of eluate to a new PCR tube for downstream end-recovery use.
Note: Be sure not to transfer the magnetic beads; trace bead contamination can affect the proper performance of subsequent DNA library construction.
1.3 Quantification and quality control of DNA from constructed samples
Library sample DNA refers to the DNA in the end-repair step, and the amount of compatible sample DNA in this kit ranges from 0.1-1000 ng, with a volume of ≤ 43 μl. It should be ensured that the library sample DNA fragments are concentrated as much as possible, and the more concentrated the fragments are, the better the quality of sequencing will be; on the contrary, the quality of sequencing will be reduced.
2 Library construction process
Regarding library sample DNA: If the sample DNA after physical interruption has a concentrated distribution and is of high purity, it can be directly end-repaired and the splice products can be fully recovered. If the DNA of the physically broken samples is more widely distributed, length sorting is usually required. We recommend the use of magnetic bead double sorting, which can also be carried out by cut-gel purification. Refer to 1.2 for magnetic bead double sorting protocols.
2.1 End-of-pipe repair
2.1.1 According to the sample concentration, take an appropriate amount of sample (100 ng is recommended) into a new PCR tube and replenish with deionized water to a total volume of 43 μl (see Table 2). For each batch of library construction, add DNA Control as the library quality control, the sample volume of DNA Control is 2 μl, and replenish 41 μl of deionized water to a total volume of 43 μl, and prepare the following end repair reaction mix in the PCR tube:
Table 2 Formulation of end-repair reaction solution

2.1.2 Shake and mix for 5 s. Instantaneous centrifugation collects the reaction solution to the bottom of the tube, ensuring that there are no air bubbles in the reaction solution;
2.1.3 Place the PCR tube containing the reaction mixture from the previous step on the PCR instrument and react under the following conditions:
Table 3 End-repair reaction conditions

2.2 Joint connections
It is recommended to use CombiVision's second-generation sequencing multi-sample junction primer kit Ⅰ, Ⅱ or Ⅲ.
2.2.1 Add the following reaction mixture directly to the above reaction solution where DNA end repair has been completed
Table 4 Preparation of joint connection reaction mixture
|
Note:
1. If the library sample input is less than 50 ng, please dilute Adaptor for MGI 5-fold with deionized water and then use it.
2. Shake and mix for 5 s, make sure that the mixing is sufficient, and then centrifuge the reaction solution to the bottom of the tube; 3. Place the connected reaction system on the PCR instrument and perform the reaction according to the conditions in the table below:
Table 5 Connector Connection Reaction Procedure
| |||
2.3 Purification of linkage products
1. Remove the CMPure beads 30 min in advance and place them at room temperature, and shake well before use;
2. Pipette 1 times the volume (80 μl) of CMPure into 80 μl of ligated product, shake and mix for 5 s, and incubate for 5 min at room temperature;
3. For instantaneous centrifugation, place the centrifuge tube on a magnetic rack and let it stand for 5 min until the liquid is clarified, pipette and discard the supernatant;
4. Keeping the centrifuge tube fixed on a magnetic rack, add 250 μl of freshly prepared 80% ethanol and discard the ethanol completely after the suspended beads are fully adsorbed (about 1 min);
5. Repeat step 4 once, the last time try to suck up the liquid at the bottom of the tube, if there is a small amount of residue in the wall of the tube can be centrifuged instantly, after separation on the magnetic rack, use a small-volume pipette to suck up the liquid at the bottom of the tube; Note: Do not suck up the magnetic beads, so as not to affect the yield.
6. Keep the centrifuge tube fixed on the magnetic rack, open the cap of the centrifuge tube and dry at room temperature for 5~6 min until the beads are free of reflection and cracks;
7. Remove the centrifuge tube from the magnetic rack, add 46 μl of deionized water for DNA elution, shake and mix for 5 s, and dissolve for 5 min at room temperature;
8. Instantaneous centrifugation, place the centrifuge tube on a magnetic rack and let it stand for 5 min until the liquid is clarified, then transfer all 44 μl of the supernatant to a new PCR tube for the next reaction or store it at -20℃.
2.4 PCR amplification
2.4.1 Prepare PCR reaction mix (Table 6): add 6 μl Index Primer Mix to the PCR tube from the previous step (it is recommended to use the second-generation sequencing multi-sample junction primer kit Ⅰ, Ⅱ, or Ⅲ, and add one Index Primer Mix or a set of Index Primer Mix for each sample, and then add 50 μl 2×PCR Mix.
Note: The Index Primer Mix is composed of Universal primer and Index primer, of which there are 128 Index primers. According to different mixing strategies, different Indexes can be added to each sample, or one set of Indexes can be added to one sample; it is required to ensure that all the Indexes in the final mixed library are assembled in sets. 4 of Indexes 1-16 are in one set, and there are 4 sets in total, which are 1-4, 5-8, 9-12, and 13-16 respectively. 8 of Indexes 17-128 are in one set, and there are 14 sets in total, which are 17-24, 25-25, and 13-16 respectively. In Index17-128, 8 are a set, totaling 14 sets, respectively 17-24, 25-32, 33-40, 41-48, 49-56, 57-64, 65-72, 73-80, 81-88, 89-96, 97-104, 105-112, 113-120 and 121-128.
Table 6 Preparation of PCR reaction mixes

2. Shake and mix for 5 s. Instantly centrifuge to collect the reaction solution to the bottom of the tube;
3. Place the above PCR tubes on the PCR instrument and perform the reaction according to the conditions in the table below:
Table 7 PCR reaction program

Note: The number of cycles should be adjusted according to the amount of starting DNA.
The exact number of cycles can be found in Table 8.

Attention:
1 FFPE Sample quality is poor and may be increased by 3 cycles from the recommended maximum number of cycles.
2 When DNA quality is poor and libraries are long, the number of cycles can be increased appropriately to obtain a sufficient amount of library.
3 *When a full-length Adaptor is used for junction ligation and the library output meets the application requirements, the PCR-Free library can be obtained directly without PCR amplification; if an incomplete Adaptor is used, 1-3 rounds of PCR amplification are required to obtain the complete Adaptor sequence required for sequencing.
4 The number of PCR cycles is ≥ 12 when the sample type is cfDNA. 5 The number of DNA Control cycles is set to 7.
2.5 PCR product purification
1. Remove the CMPure 30 min in advance and place it at room temperature. Shake well before use;
2. Add 1x the volume of CMPure to the PCR product, shake for 5 s, and incubate for 5 min at room temperature;
3. For instantaneous centrifugation, place the centrifuge tube on a magnetic rack and let it stand for 5 min until the liquid is clarified, pipette and discard the supernatant;
4. Keeping the centrifuge tube fixed on a magnetic rack, add 250 μl of freshly prepared 80% ethanol and discard the ethanol completely after the suspended beads are fully adsorbed (about 1 min);
5. Repeat step 4 once, the last time try to suck up the liquid at the bottom of the tube, if there is a small amount of residue in the wall of the tube can be centrifuged instantly, after separation on the magnetic rack, use a small-volume pipette to suck up the liquid at the bottom of the tube; Note: Do not suck up the magnetic beads, so as not to affect the yield.
6. Keep the centrifuge tube fixed on the magnetic rack, open the cap of the centrifuge tube and dry at room temperature for 5~6 min until the beads are free of reflection and cracks;
7. Remove the centrifuge tube from the magnetic rack, add 32 μl of deionized water for DNA elution, shake and mix for 5 s, and dissolve for 5 min at room temperature;
8. Instantaneous centrifugation, place the centrifuge tube on a magnetic rack and let it stand for 5 min until the liquid is clarified, then transfer 30 μl of supernatant to a new 1.5 ml centrifuge tube for on-line testing or storage at -20℃.
2.6 Quality control of the library
Usually, the constructed library needs to be tested for library concentration and length distribution. Determination of library concentration: It is recommended to use fluorescent dye method (Qubit or Picogreen) or qPCR absolute quantitative method to determine the library concentration. Library length distribution: Agilent 2100 Bioanalyzer; LabChip GXll Touch microfluidic capillary electrophoresis and other equipment for length distribution detection.

规格
英文名称
Fast DNA Library Prep Set for Illumina&MGI
储存与运输
储存条件
-20°C储存,避免反复冻融
运输条件
超低温运输
技术文档
高级数据
质检证书(CoA,COO,BSE/TSE 和分析图谱)
C of A & Other Certificates(BSE/TSE, COO):
输入批号以搜索分析图谱:
技术文档和文章
溶液计算器
常见问题
本产品应如何储存?
请于?20 °C条件下保存。避免反复冻融。建议按单次用量分装保存。
本产品如何运输?
本产品采用保温箱配冰袋运输。收货后请立即拆包,并按上述储存条件保存。
如何获取批次专用COA?
每个订单都会随附分析证书(COA),您也可以从账户订单历史中下载。如需订购前的COA,请联系您的客户代表,或使用PDP上的"申请COA"按钮——我们将提供代表性批次的COA。
产品仅提供给经过验证的企业、机构和合格的专业人员用于研发。不适用于人类、动物、诊断或治疗。
Copyright © 2023至今 上海阿拉丁生化科技股份有限公司 保留所有权利。


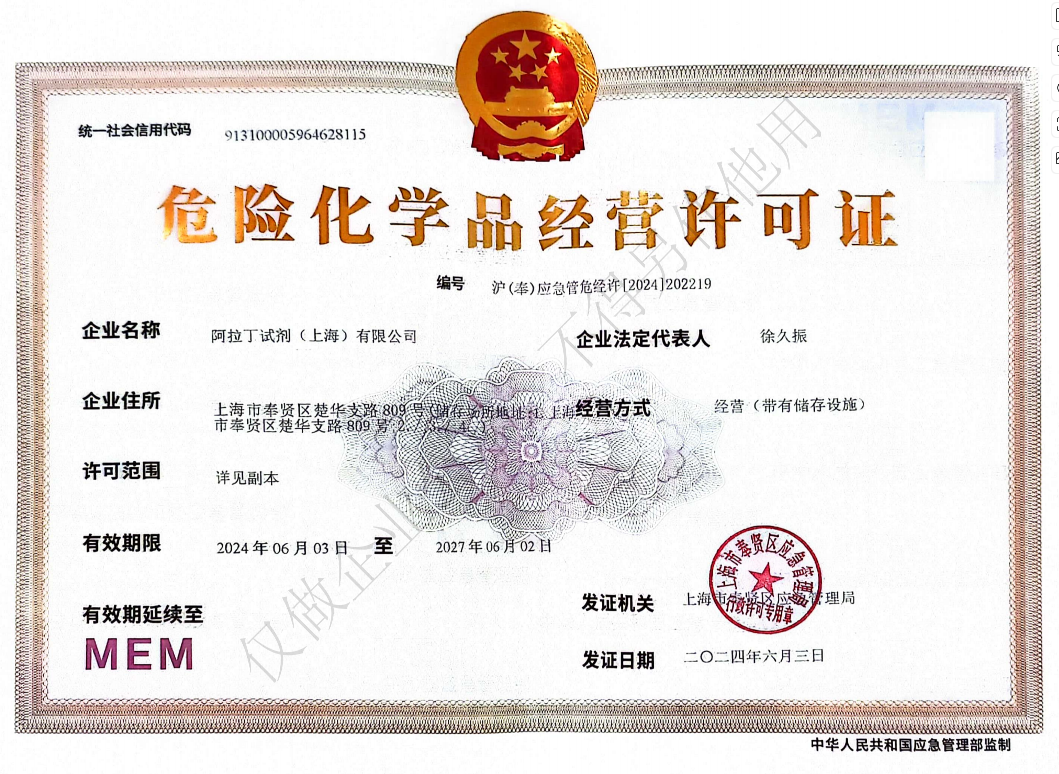 危险品化学品经营许可证(带存储)