PVDF转印膜是一种聚偏氟乙烯(PVDF)微孔膜,用于从各种凝胶基质转移蛋白质。与消化纤维素膜相比,它改善了处理特性。这种疏水膜的有0.45μm和0.22μm两种孔径型号,能够结合广泛分子量的蛋白质。
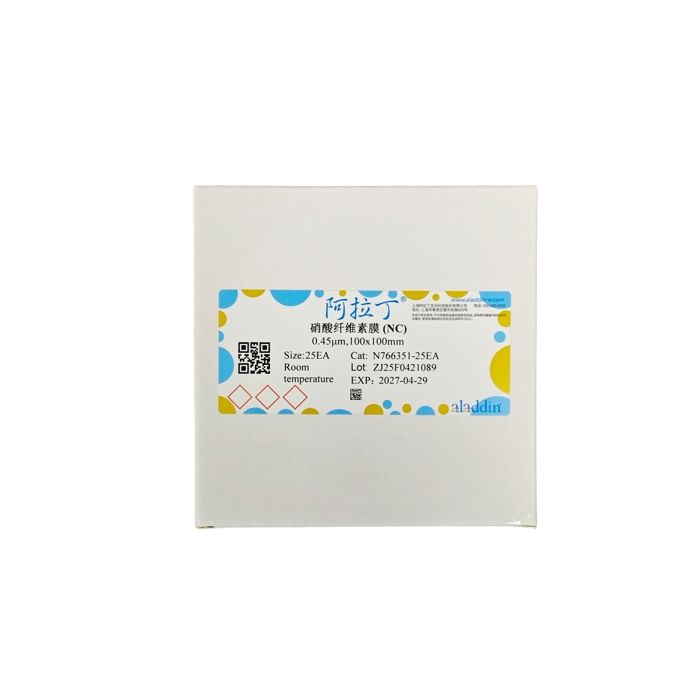
NC转印膜是一种硝酸纤维素微孔膜,用于从各种凝胶基质转移蛋白质。与PVDF膜相比,NC膜属于亲水膜,无需预先做亲水处理,这种亲水膜有0.45μm和0.22μm两种孔径型号,能够结合广泛分子量的蛋白质。
0.45μm孔径适合大部分的蛋白,具有较高的检测灵敏度,0.22μm孔径适合分子量小于20kDa的蛋白,能更好的吸附和保留小分子蛋白。阿拉丁的PVDF和NC转印膜具有优异的蛋白质保留率、高物理强度和宽化学兼容性,使其较好的应用于免疫检测。
阿拉丁PVDF和NC转印膜各货号性能和应用对比:

|
注意事项:
1. 操作薄膜时,务必戴上手套,以免留下指纹。
2. 使用钝性钳子防止膜损伤。
3. 在切割或处理过程中,将保护纸(淡蓝纸)与薄膜一起保存,但润湿膜时保护纸应丢弃。
4. 小心搬运,避免薄膜表面出现划痕,不要折叠薄膜。
5. 疏水性PVDF转印膜必须在甲醇溶液中提前润湿,亲水性NC转印膜无需提前润湿。一旦膜被润湿,它就会从不透明到半透明。
6. 蛋白质转移后,用超纯水清洗印迹,以消除残留杂物。
7. 印迹膜块可以风干并在4°C下储存数月(以备日后使用) ,也可以立即使用。
使用说明:
一、膜润湿
1. 将干膜在甲醇中润湿10-20秒,或者直到它从不透明的白色变成均匀的半透明灰色。
2. 将膜浸入超纯水中1-2分钟,以置换醇。(NC膜无需进行以上两步操作)。
3. 在转移缓冲液中平衡膜2-3分钟或直到可以使用为止。
注意:一旦薄膜被弄湿,就不要让它变干。它可以保留在缓冲液中直到蛋白质转移。如果薄膜变干(变成不透明的白色)即使是部分,也必须再次将其润湿(步骤1-3)。
二、半干式转移
1. 将蛋白质混合物分散在聚丙烯酰胺凝胶上。
2. 将凝胶浸入转移缓冲液中,并使其平衡10-15分钟。
3. 根据制造商对所用转移装置的说明组装转移堆。
注意:为了确保均匀转移,请小心地滚动一个干净的移液管或印迹辊覆盖在堆叠中的每一层的表面上。不适用过大的压力,因为这可能会损坏凝胶和膜。
4. 根据转移设备制造商的说明转移蛋白质。
5. 去除转移系统.上的印迹,并在超纯水中短暂冲洗膜去除凝胶碎屑。印迹可以风干储存,也可以立即使用用于免疫检测步骤。
注意:免疫检测前干燥印迹可能会增强某些蛋白质的结合并减少背景色。
三、标准免疫检测
1. 如果印迹已经干燥,则将其在醇甲醇中重新润湿15秒或直到它从不透明的白色变为半透明的灰色。
2. 在超纯水中冲洗印迹1分钟。
3. 将印迹置于封闭缓冲液中,在温和搅拌下孵育1小时。商品化抗体稀释液、洗涤缓冲液或封闭缓冲液中稀释一抗。
4. 将印迹置于稀释的一抗溶液中,并在温和搅拌下室温孵育1小时(或4°C过夜孵育)。
5. 用洗涤缓冲液(添加Tween-20表面活性剂的缓冲液(TBST或PBST))3-5次,每次5分钟。准备商品化抗体稀释液、洗涤或封闭缓冲液稀释二抗。
6. 将印迹置于稀释的酶标记二抗溶液中,室温孵育1小时。
7. 用洗涤缓冲液洗涤印迹3- 5次,每次5分钟。
8. 将印迹膜放入干净的容器中并加入适当的检测试剂。
9. 根据检测试剂制造商的说明,孵育1-5分钟。
10. 对于HRP或AP化学发光试剂,将印迹暴露于x射线胶片或获取图像使用数字成像系统。对于显色检测,添加试剂并等待信号出现。
PVDF transfer membrane is a microporous polyvinylidene fluoride (PVDF) membrane used for transferring proteins from various gel matrices. It offers better handling properties compared to nitrocellulose membranes. This hydrophobic membrane is available in two pore sizes, 0.45 μm and 0.22 μm, and can bind proteins with a wide range of molecular weights.
NC transfer membrane is a microporous nitrocellulose membrane designed for protein transfer from diverse gel matrices. Unlike PVDF membranes, NC membranes are hydrophilic and do not require pre-wetting activation. Supplied in 0.45 μm and 0.22 μm pore sizes, this hydrophilic membrane is capable of binding proteins spanning a broad molecular weight range.
The 0.45 μm pore size is suitable for most proteins and delivers high detection sensitivity. The 0.22 μm pore size is optimized for proteins with molecular weights below 20 kDa, enabling superior adsorption and retention of small-molecular-weight proteins. Aladdin PVDF and NC transfer membranes feature excellent protein retention, robust physical strength, and broad chemical compatibility, making them well-suited for immunoassays.
Comparison of performance and applications for each catalog number of Aladdin PVDF and NC transfer membranes:

|
Precautions:
1. Always wear gloves when handling the membrane to avoid leaving fingerprints.
2. Use blunt forceps to prevent membrane damage.
3. Keep the protective light blue backing paper attached to the membrane during cutting or handling; discard the backing paper prior to membrane wetting.
4. Handle the membrane carefully to avoid scratches on its surface and do not fold it.
5. Hydrophobic PVDF transfer membranes must be pre-wetted with methanol solution, while hydrophilic NC transfer membranes require no pre-wetting. The membrane will turn translucent from opaque once wetted.
6. After protein transfer, rinse the blot with ultrapure water to remove residual contaminants.
7. Blotted membranes can be air-dried and stored at 4°C for several months for subsequent use, or used immediately.
Instructions for Use:
I. Membrane Wetting
1. Immerse the dry membrane in methanol for 10–20 seconds, or until it turns uniformly translucent gray from opaque white.
2. Submerge the membrane in ultrapure water for 1–2 minutes to displace methanol. (These two steps are not required for NC membranes.)
3. Equilibrate the membrane in transfer buffer for 2–3 minutes or until ready for use.
Note: Do not allow the membrane to dry out once wetted. It may remain submerged in buffer until protein transfer. If the membrane dries out (turns opaque white), even partially, repeat the wetting procedure (Steps 1–3).
II. Semi-Dry Transfer
1. Separate protein samples on a polyacrylamide gel.
2. Immerse the gel in transfer buffer and equilibrate for 10–15 minutes.
3. Assemble the transfer stack following the manufacturer’s instructions for your transfer unit.
Note: To ensure uniform protein transfer, gently roll a clean pipette or blot roller over the surface of each layer in the stack. Do not apply excessive pressure, as this may damage the gel and membrane.
4. Perform protein transfer in accordance with the transfer equipment manufacturer’s guidelines.
5. Remove the blot from the transfer system and briefly rinse the membrane with ultrapure water to eliminate gel debris. The blot can be air-dried for storage or used immediately for immunodetection.
Note: Drying the blot prior to immunodetection may improve binding of certain proteins and reduce background signal.
III. Standard Immunodetection
1. If the blot has dried, rewet it in methanol for 15 seconds or until it turns translucent gray from opaque white.
2. Rinse the blot with ultrapure water for 1 minute.
3. Place the blot in blocking buffer and incubate with gentle agitation for 1 hour. Dilute the primary antibody using commercial antibody diluent, wash buffer or blocking buffer.
4. Submerge the blot in diluted primary antibody solution and incubate at room temperature for 1 hour with gentle agitation (or incubate overnight at 4°C).
5. Wash the blot 3–5 times with wash buffer (buffer supplemented with Tween-20 surfactant, i.e., TBST or PBST), 5 minutes per wash. Prepare the diluted secondary antibody with commercial antibody diluent, wash buffer or blocking buffer.
6. Immerse the blot in diluted enzyme-conjugated secondary antibody solution and incubate at room temperature for 1 hour.
7. Wash the blot 3–5 times with wash buffer, 5 minutes each time.
8. Transfer the blotting membrane to a clean container and add the appropriate detection reagent.
9. Incubate for 1–5 minutes following the detection reagent manufacturer’s instructions.
10. For HRP or AP chemiluminescence reagents, expose the blot to X-ray film or capture images with a digital imaging system. For colorimetric detection, add the reagent and wait for signals to develop. |

 ZJ26F0738088


 危险品化学品经营许可证(带存储)