免疫印迹试验,又称Western Blot,是一种将高分辨率凝胶电泳与免疫化学分析相结合的杂交技术。免疫印迹试验的关键为将待测蛋白质固定在基质上用于后续检测。
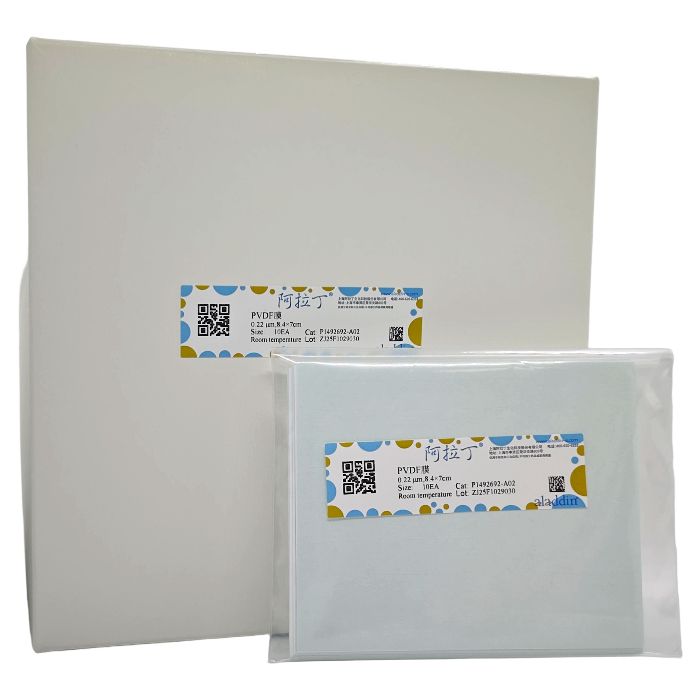
聚偏氟乙烯(PVDF)膜是典型的免疫印迹膜之一,适用于结合各种蛋白质。PVDF膜材是天然疏水的,且孔结构分布均匀,对蛋白分子有很强的结合能力。阿拉丁转印膜分为0.45μm和0.22μm两种精度,均为疏水性膜。其中精度0.45μm的适用于绝大多数分子量的蛋白,而精度0.22μm的更适合小于20kDa以下的蛋白。
阿拉丁PVDF膜有较高的机械强度,裁切过程中不易产生不规则断裂,兼容化学发光检测和免疫荧光检测。阿拉丁PVDF膜不区分正反面,使用过程中两面均可贴近凝胶。
本说明书提供了一种湿法转印实验方案作为参考。针对不同的蛋白,为了达到最佳转印效果,实验条件可能需要进行适当的调整。
| 货号 | 孔径 | 尺寸 | 包装 |
P1492692-A01
| 0.22μm
| 27.5cm×3.75m
| 卷
|
P1492692-A02
| 0.22μm
| 8.4×7cm
| 片 |
P1492692-A03
| 0.22μm
| 15×15cm
| 片
|
P1492692-A04
| 0.22μm
| 20×20cm
| 片
|
P1492692-B01
| 0.45μm
| 27.5cm×3.75m
| 卷
|
P1492692-B02
| 0.45μm
| 8.4×7cm
| 片
|
P1492692-B03
| 0.45μm
| 15×15cm
| 片
|
P1492692-B04
| 0.45μm
| 20×20cm
| 片
|
用于Western Blotting推荐材料
| 试剂 | 配制方法 |
30% (W/V) 丙烯酰胺单体溶液
| 丙烯酰胺29g,甲叉双丙烯酰胺1g
加去离子水,定容至100mL,调整溶剂pH值不超过7.0,置棕色瓶中,储存于4℃冰箱 |
| 10%过硫酸铵(-20℃保存) | 过硫酸铵1g,加去离子水,定容至10mL,分装,每管1mL,共10管 |
| 1.5M Tris-HCl (pH 8.8) | Tris 18.2g
滴加HCl调pH至6.8,加去离子水,定容至100mL,再次调pH至8.8 |
| 1M Tris-HCl (pH 6.8) | Tris 12.12g
滴加HCl调pH至6.8,加去离子水,定容至100mL,再次调pH至6.8 |
| 10×蛋白电泳缓冲液 | Tris 30g
甘氨酸 144g, pH8.3
SDS 10g
去离子水定容至1000mL |
| 6×SDS上样缓冲液 | 0.5M Tris, pH6.8 0.35M 7.0mL
SDS 0.35M 1.0g
Glycerol 30%V/V 3.0mL
DTT 0.6M 0.93g
Bromophenol Blue 0.175mM 1.2mg |
| 转印缓冲液 | 25mM Tris, 192mM甘氨酸, 20% (V/V) 甲醇
溶解3.03g Tris和14.4甘氨酸于500mL去离子水中
再加入200mL甲醇,最终用去离子水定容至1L |
| TBS溶液 | 20mM Tris-HCl, 500mM NaCI
溶解4.84g Tris和58.48g NaCI于1.5L水中,用HCI调节pH到7.5
最终用去离子水定容至2L |
TBST洗涤缓冲液
| 20mM Tris-HCl, 500mM NaCl, 0.1%Tween20
向1L TBS溶液中加入1mL Tween20
|
封闭缓冲液
| 5%脱脂奶粉-TBS,称量5.0g脱脂奶粉于100mL TBS溶液中,搅拌至溶解
|
| 抗体稀释液 | 5%脱脂奶粉-TBST,称量5.0g脱脂奶粉于100mL TBST溶液中,搅拌至溶解
|
一抗(特定于相关蛋白)
| 按照供应商提供的说明书使用,通常稀释于抗体稀释液中
|
二抗(专为一抗体而设),HRP酶偶联标记
| 按照供应商提供的说明书使用,通常稀释于抗体稀释液中
|
| PVDF膜、滤纸、海绵垫、纯水、100%甲醇 |
使用须知
1、阿拉丁转印膜为疏水性膜,故使用前需要用无水甲醇/无水乙醇进行激活。激活操作为将裁切为需要尺寸的膜用镊子轻轻夹取,放入装有无水甲醇/无水乙醇的容器中,使膜完全被液体覆盖,该过程最好持续1min以上以确保膜整体被激活完全,判定激活成功的标志为膜由白色不透明变为半透明状态,此时可将膜放入转膜液中进行进一步平衡。
2、平衡过程中,膜可能由于表面疏水性的改变停留在液体表面,此时可轻轻用镊子将膜压入转膜液中, 确保无水甲醇/无水乙醇被转膜液完全置换,该过程最好持续1min以上。
3、膜一旦被激活,在后续的转膜及抗体孵育过程中务必保持膜的润湿状态,一旦膜出现变干,将直接影响最后条带的呈现,结果可能出现条带缺失/高背景或其他异常。
使用说明
1、SDS-PAGE电泳
1.1 玻璃板对齐后垂直卡在架子上准备灌胶。
注意:操作时两块玻璃板一定要对齐,以免漏胶。
1.2 按比例配制一定浓度的分离胶,加入TEMED后立即摇匀即可灌胶。灌胶时,可用移液枪吸取沿玻璃板灌胶,待胶面距离玻璃板上端约2cm处即可。然后胶上再加一层水液封,液封后胶凝的更快。
注意:灌胶时,胶一定要沿着玻璃板流下,以免胶中产生气泡。加水液封时要尽量慢一点,以免胶变型。
1.3 当水和胶之间有一条折线时,说明胶已凝固。再等5min使胶充分凝固,就可倒去胶上层水并用滤纸将水吸干。
1.4 按比例配制5%的浓缩胶,加入TEMED后立即摇匀,即可灌胶。将剩余空间灌满浓缩胶后将梳子插入浓缩胶中。插梳子时要使梳子保持水平。待浓缩胶充分凝固双手分别捏住梳子两边垂直向上轻轻将其拔出,即可准备电泳。
不同浓度分离胶配比
| 试剂 | 6% | 8%
| 10%
| 12%
| 15%
|
| H₂O (ml) | 3.18 | 2.78 | 2.38 | 1.98 | 1.38 |
| 30%丙烯酰胺(29:1)/mL | 1.2 | 1.6 | 2.0 | 2.4 | 3.0 |
| 1.5M Tris-HCl (pH8.8)/mL | 1.5 | 1.5
| 1.5
| 1.5
| 1.5
|
| 10% SDS/μL | 60 | 60
| 60
| 60
| 60
|
| 10% AP(过硫酸铵)/μL | 60
| 60
| 60
| 60
| 60
|
| TEMED/μL | 3 | 3
| 3
| 3
| 3
|
| 总体积/mL | 6 | 6
| 6
| 6
| 6 |
| 试剂 | 5%浓缩胶配比 |
H₂O (ml)
| 2 |
30%丙烯酰胺(29:1)/mL
| 0.5 |
1.5M Tris-HCl (pH8.8)/mL
| 0.5
|
10% SDS/μL
| 40 |
10% AP(过硫酸铵)/μL
| 30 |
TEMED/μL
| 4 |
总体积/mL
| 3 |
1.5 测量样品中蛋白含量,计算所需蛋白(如1μg, 0.5μg等)的溶液体积即为上样量。取出上样样品至0.5mL离心管,加入6×SDS上样。
1.6 上样前要将样品于沸水浴中煮沸5min,使蛋白变性。
1.7 加入电泳缓冲液,使得电泳液漫过内侧的小玻璃板,开始准备上样。用移液枪贴壁吸取样品,应尽量避免吸入气泡。将移液枪枪头插入加样孔中,缓慢加入样品。
1.8 选择适当的电压进行电泳。一般采用恒压(浓缩胶90V 分离胶150V),电泳至溴酚蓝染料前沿下至凝胶底部大约1cm,即可终止电泳,进行转膜。
2、转膜
2.1 小心取下凝胶,用纯水漂洗,将浓缩胶轻轻刮去,浸入转印缓冲液中平衡5min。
2.2 浸入无水甲醇或无水乙醇1min,观察到整膜由白色不透明变为半透明即可,再浸入转膜缓冲液平衡1min以上备用。
2.3 以比凝胶窄1mm的尺寸裁6张滤纸,浸入转膜缓冲液中备用即可。
2.4 在加有转印液的搪瓷盘里放入转膜用的夹子、两块海绵垫、一支玻棒、滤纸和活化的膜。
2.5 将夹子打开使黑的一面保持水平。在上面垫一张海绵垫,用玻棒来回擀几遍以擀走里面的气泡。在垫子上垫三层滤纸,一手固定滤纸一手用玻棒擀去其中的气泡。将胶盖于滤纸上,用手调整使其与滤纸对齐,轻轻用玻棒擀去气泡。将膜盖于胶上,要盖满整个胶(膜盖下后不可再移动)并除气泡。在膜上盖三层滤纸并除去气泡。最后盖上另一个海绵垫,擀几下即可合起夹子。
注意:整个操作在转印缓冲液中进行,注意避免引入气泡,否则会影响转印效果。
2.6 将夹子放入转移槽中,要使夹的黑面对槽的黑面,加入1L转印缓冲液。转印槽置于冰水浴中,以免转印时温度过高。
300mA恒流运行30-90min。
注意:推荐使用预染的蛋白Marker来评估转膜的效果。

3、免疫检测
以下是免疫检测的一般方案。关于最佳结果,请参考免疫检测试剂制造商提供的方案。
3.1 将膜用TBST漂洗,去除可能残留的凝胶,膜蛋白面朝上转移至含有封闭液的孵育盒中,室温下脱色摇床上摇动封闭1h以上,2h最佳。
3.2 弃去孵育盒中的封闭液,加入TBST稀释至适当浓度的一抗,室温下孵育1~2h后(也可放置4℃冰箱中封闭过夜), 弃去或回收一抗,用TBST在室温下脱色摇床上洗三次,每次10min。
3.3 加入TBST稀释至适当浓度的二抗,室温下孵育1~2h后,弃去或回收二抗,用TBST在室温下脱色摇床上洗三次,每次10min。
3.4 化学发光、化学显色
建议参照所用试剂说明书操作,使用适当的检测方法对印迹膜成像。
注意事项
本产品仅限于专业人员的科学研究用,临床诊断、治疗或食品、药品等用途未经验证,请谨慎使用。为了您的安全和健康,请穿实验服并戴一-次性手套操作。
Immunoblotting, also known as Western Blot, is a hybridization technique that combines high-resolution gel electrophoresis with immunochemical analysis. The key to immunoblotting is immobilizing the target proteins on a solid support (membrane) for subsequent detection.
Polyvinylidene fluoride (PVDF) membrane is one of the typical immunoblotting membranes, suitable for binding various proteins. PVDF membrane is naturally hydrophobic with a uniform pore structure, offering strong protein-binding capacity. Aladdin's transfer membranes are hydrophobic and available in two pore sizes: 0.45 μm and 0.22 μm. The 0.45 μm pore size is suitable for proteins of most molecular weights, while the 0.22 μm pore size is more appropriate for proteins smaller than 20 kDa.
Aladdin PVDF membranes exhibit high mechanical strength, resist irregular breakage during cutting, and are compatible with both chemiluminescent and fluorescent detection methods. Aladdin PVDF membranes are not sided; either side can face the gel during use.
This manual provides a reference wet transfer protocol. Optimal transfer conditions may require adjustment for different proteins.
Product Code
| Pore Size
| Size
| Format
|
P1492692-A01
| 0.22μm
| 27.5cm×3.75m
| Roll
|
P1492692-A02
| 0.22μm
| 8.4×7cm
| Sheet
|
P1492692-A03
| 0.22μm
| 15×15cm
| Sheet
|
P1492692-A04
| 0.22μm
| 20×20cm
| Sheet
|
P1492692-B01
| 0.45μm
| 27.5cm×3.75m
| Roll
|
P1492692-B02
| 0.45μm
| 8.4×7cm
| Sheet
|
P1492692-B03
| 0.45μm
| 15×15cm
| Sheet
|
P1492692-B04
| 0.45μm
| 20×20cm
| Sheet
|
Recommended Materials for Western Blotting
Reagent
| Preparation Method
|
30% (W/V) Acrylamide Monomer Solution
| 29g Acrylamide, 1g Bis-acrylamide. Add deionized water to 100mL. Adjust pH to ≤7.0. Store in a brown bottle at 4°C.
|
10% Ammonium Persulfate (APS) (-20°C storage)
| 1g APS. Add deionized water to 10mL. Aliquot into 10 tubes, 1mL each.
|
1.5M Tris-HCl (pH 8.8)
| 18.2g Tris base. Adjust pH to 6.8 with HCl, then add deionized water to 100mL. Readjust pH to 8.8.
|
1M Tris-HCl (pH 6.8)
| 12.12g Tris base. Adjust pH to 6.8 with HCl, then add deionized water to 100mL. Readjust pH to 6.8.
|
10x SDS-PAGE Running Buffer
| 30g Tris base, 144g Glycine, 10g SDS. Add deionized water to 1000mL. pH ~8.3.
|
6x SDS Loading Buffer
| 0.5M Tris pH6.8 (7.0mL), SDS (1.0g, 0.35M final), Glycerol (3.0mL, 30% V/V), DTT (0.93g, 0.6M final), Bromophenol Blue (1.2mg, 0.175mM final).
|
Transfer Buffer
| 25mM Tris, 192mM Glycine, 20% (V/V) Methanol. Dissolve 3.03g Tris and 14.4g Glycine in 500mL deionized water. Add 200mL methanol, bring to 1L with water.
|
TBS Buffer
| 20mM Tris-HCl, 500mM NaCl. Dissolve 4.84g Tris and 58.48g NaCl in 1.5L water. Adjust pH to 7.5 with HCl. Bring to 2L with deionized water.
|
TBST Wash Buffer
| 20mM Tris-HCl, 500mM NaCl, 0.1% Tween 20. Add 1mL Tween 20 to 1L of TBS buffer.
|
Blocking Buffer
| 5% Skim Milk in TBS. Dissolve 5.0g skim milk powder in 100mL TBS buffer.
|
Antibody Dilution Buffer
| 5% Skim Milk in TBST. Dissolve 5.0g skim milk powder in 100mL TBST buffer.
|
Primary Antibody (target specific)
| Use according to the supplier's instructions. Typically diluted in Antibody Dilution Buffer.
|
Secondary Antibody (HRP conjugated, specific to primary antibody host)
| Use according to the supplier's instructions. Typically diluted in Antibody Dilution Buffer.
|
Other Materials
| PVDF membrane, Filter paper, Sponge pads, Pure water, 100% Methanol |
User Notes
1.Aladdin transfer membranes are hydrophobic and must be activated in absolute methanol or absolute ethanol prior to use. To activate, gently immerse the cut membrane in a container of absolute methanol/ethanol using forceps, ensuring it is fully submerged. Soak for at least 1 minute to ensure complete activation. Successful activation is indicated by the membrane turning from opaque white to semi-transparent. Subsequently, transfer the membrane to transfer buffer for equilibration.
2.During equilibration, the membrane may float on the surface due to altered hydrophobicity. Gently submerge it into the transfer buffer using forceps to ensure complete replacement of the methanol/ethanol with transfer buffer. Soak for at least 1 minute.
3.Once activated, the membrane must be kept wet throughout the subsequent transfer and antibody incubation steps. Allowing the membrane to dry will directly affect the final band pattern, potentially causing missing bands, high background, or other anomalies.
Protocol
1. SDS-PAGE Electrophoresis
1.1 Align the glass plates and secure them vertically in the casting frame.
Note: Ensure the plates are perfectly aligned to prevent leakage.
1.2 Prepare the separating gel solution according to the desired concentration (see table below). Add TEMED, mix immediately, and pour the gel along the space between the plates until the level is about 2 cm from the top. Carefully overlay the gel with water or butanol for sealing.
Note: Pour the gel carefully to avoid bubbles. Overlay slowly to prevent gel distortion.
1.3 Once a distinct interface appears between the gel and the overlay (indicating polymerization), wait an additional 5 minutes for complete solidification. Pour off the overlay and blot away any residual liquid with filter paper.
1.4 Prepare the 5% stacking gel solution (see table below). Add TEMED, mix immediately, and pour the remaining space. Insert the comb horizontally. After the stacking gel has polymerized, carefully remove the comb by pulling it straight up. The gel is now ready for electrophoresis.
Separating Gel Formulations (for 6 mL total volume)
| Reagent | 6% | 8%
| 10%
| 12%
| 15%
|
H₂O (mL)
| 3.18 | 2.78 | 2.38 | 1.98 | 1.38 |
| 30% Acrylamide (29:1) (mL) | 1.2 | 1.6 | 2.0 | 2.4 | 3.0 |
| 1.5M Tris-HCl (pH8.8) (mL) | 1.5 | 1.5
| 1.5
| 1.5
| 1.5
|
10% SDS (μL)
| 60 | 60
| 60
| 60
| 60
|
10% APS (μL)
| 60
| 60
| 60
| 60
| 60
|
TEMED (μL)
| 3 | 3
| 3
| 3
| 3 |
Stacking Gel Formulation (5%, for 3 mL total volume)
| 试剂 Reagent | Volume |
H₂O (mL)
| 2.0 |
| 30% Acrylamide (29:1) (mL) | 0.5 |
1.5M Tris-HCl (pH6.8) (mL)
| 0.5
|
10% SDS (μL)
| 40 |
10% APS (μL)
| 30 |
TEMED (μL)
| 4 |
1.5 Measure the protein concentration of your samples. Calculate the volume containing the desired amount of protein (e.g., 1 μg, 0.5 μg) – this is the loading volume. Transfer this volume to a 0.5 mL tube and add the appropriate volume of 6x SDS Loading Buffer.
1.6 Denature the samples by heating at 95-100°C for 5 minutes.
1.7 Fill the electrophoresis chamber with running buffer, ensuring the inner chamber is filled above the level of the wells. Using a pipette, slowly load the samples into the wells, avoiding introducing bubbles.
1.8 Run the gel at constant voltage (e.g., 90V through the stacking gel, 150V through the separating gel) until the bromophenol blue dye front reaches about 1 cm from the bottom of the gel. Stop electrophoresis and proceed to transfer.
2. Wet Transfer
2.1 Carefully disassemble the gel unit and rinse the gel with pure water. Gently remove the stacking gel. Equilibrate the gel in transfer buffer for 5 min.
2.2 Activate the PVDF membrane by immersing it in 100% methanol for at least 1 min until it turns uniformly semi-transparent. Equilibrate the activated membrane in transfer buffer for at least 1 min.
2.3 Cut 6 pieces of filter paper slightly narrower than the gel (approx. 1mm less). Soak them in transfer buffer.
2.4 Place the transfer cassette, sponge pads, a glass rod, the soaked filter papers, and the activated membrane in a tray containing transfer buffer.
2.5 Open the cassette (black side down). Place a sponge pad on the black side and roll with a glass rod to remove bubbles. Place 3 sheets of filter paper on the pad and roll out bubbles. Carefully place the equilibrated gel on the filter paper, align, and roll out any bubbles. Place the activated membrane on top of the gel, covering it completely (Do not move the membrane once placed). Roll out bubbles. Place the remaining 3 sheets of filter paper on the membrane and remove bubbles. Top with the second sponge pad, roll gently, and close the cassette.
Note: Perform all steps submerged in transfer buffer to minimize bubble formation, which hinders transfer.
2.6 Place the cassette into the transfer tank ensuring the black side faces the black (cathode) side of the tank. Fill the tank with 1L of transfer buffer. Place the tank in an ice bath or cold water bath during transfer to prevent overheating. Transfer at constant current: 300 mA for 30-90 min.
Note: Using pre-stained protein markers is recommended to monitor transfer efficiency.
3. Immunodetection
The following is a general protocol. Refer to the antibody and detection reagent manufacturers' instructions for optimal results.
3.1 Briefly rinse the membrane with TBST to remove any residual gel. Place the membrane (protein side up) in a container with blocking buffer. Block by incubating on a rocking platform at room temperature for 1-2 hours (2 hours is optimal).
3.2 Discard the blocking buffer. Incubate the membrane with the primary antibody diluted in TBST (or Antibody Dilution Buffer) for 1-2 hours at room temperature (or overnight at 4°C) with gentle shaking. Discard or recover the primary antibody. Wash the membrane three times for 10 minutes each with TBST on a shaker at room temperature.
3.3 Incubate the membrane with the HRP-conjugated secondary antibody diluted in TBST (or Antibody Dilution Buffer) for 1-2 hours at room temperature with gentle shaking. Discard or recover the secondary antibody. Wash the membrane three times for 10 minutes each with TBST on a shaker.
3.4 Detection (Chemiluminescence or Chromogenic)
Perform detection using an appropriate method (e.g., ECL reagent) according to the manufacturer's instructions and image the blot.
Precautions
This product is for research use by professionals only. Use for clinical diagnosis, therapy, or in food or pharmaceutical applications has not been validated and should be approached with caution. For your safety and health, please wear a lab coat and disposable gloves during operation.

 ZJ26F0333098


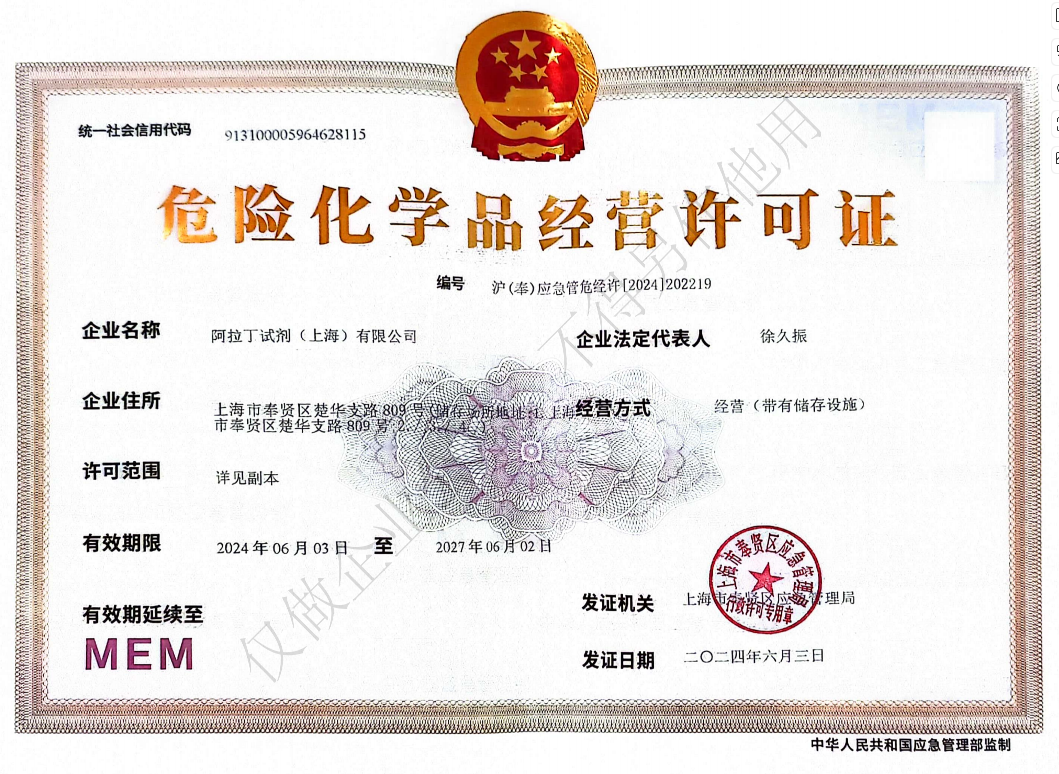 危险品化学品经营许可证(带存储)