细胞自噬绿色检测试剂盒 (MDC法)是一款细胞自噬染色检测试剂盒。本试剂盒采用荧光探针单丹磺酰尸胺 (Monodansylcadaverine, MDC),其作为一种嗜酸性染料,可通过离子捕获效应与自噬体膜脂的特异性结合,在活细胞内快速、选择性地富集于自噬性囊泡 (自噬体),并呈现明亮的绿色荧光信号,实现对体外培养细胞模型自噬活性的直观评估。与传统自噬检测相比,本试剂盒优势突出:无需转染操作,直接通过荧光染色即可实现快速检测;MDC对自噬体的特异性高。注意:MDC亦可标记其它酸性细胞器,正常细胞存在基础背景荧光,结果分析时需设对照。
细胞自噬 (Autophagy)是进化上高度保守的细胞内分解代谢途径,通过形成双层膜结构的自噬体 (Autophagosome),包裹并运送受损细胞器、错误折叠蛋白及入侵病原体至溶酶体进行降解与回收。该过程不仅是细胞在饥饿、氧化应激等不利环境下获取能量、维持生存、分化与稳态的核心机制,更在生物体的生长发育、免疫应答及环境适应中扮演着至关重要的角色。自噬功能的紊乱与肿瘤、神经退行性疾病、代谢性疾病、病原体感染及衰老等重大病理过程密切相关。鉴于其在生理与病理中的双重核心作用,准确、高效地监测细胞自噬活性已成为现代生命科学与医学研究中不可或缺的关键环节和前沿热点。
应用范围:活细胞状态实时观察自噬活性变化;无转染平台的常规自噬检测;药物、营养素、缺氧、氧化应激等条件对自噬活性筛查与半定量分析;与凋亡、坏死、细胞周期等联合研究;
产品特点:
1、实验快速:染色10 min即可成像,当天即可出结果,比传统转染法节省1-2天;
2、操作简便:无需转染,直接对活细胞染色,无需任何转染或稳转株构建;
3、适用性强:对难转染的细胞(如原代细胞)同样适用检测;
4、低毒实时:活细胞原位MDC染色,零固定/透化损伤,可连续追踪自噬动态;
5、高灵敏度:MDC嗜酸靶向自噬体/溶酶体,点状信号清晰可辨。
产品参数:
Ex/Em:335 nm/512 nm
产品组分:
| C1520234 | 组件 | 100 T | Storage | | C1520234A | 10× MDC染色液 | 1 mL | -20℃. Store in the dark. | | C1520234B | 染色缓冲液 | 50 mL | 2-8℃. | | C1520234C | 洗涤缓冲液 | 100 mL | 2-8℃. |
|
注:100 T为试剂盒组分A进行96孔板荧光显微镜检测贴壁细胞时可检测的微孔总数。
注意事项:
1. MDC Stain具有潜在毒性,实验人员必须穿实验服并佩戴一次性手套进行操作,必要时可佩戴护目镜等额外防护装备,避免试剂直接接触皮肤、黏膜及眼睛。
2. 避光:由于MDC对光照特别敏感,操作过程需尽量注意避光,同时减少所有试剂暴露于强光下的时间。
3. 实验中可通过设置正常细胞对照组,对比分析药物处理组与对照组的荧光强度,判断细胞自噬是否被诱导或抑制。同时,需注意排除非特异性染色的干扰,结合自噬相关指标进一步验证结果。
4. 本产品仅限用于培养状态下的细胞或组织,进行细胞自噬荧光染色检测。不能用于冻存细胞或组织、固定处理后的细胞或组织切片等样本的染色检测。
5. 本产品仅限于科研用途并且不得存放于普通住宅内。
6. 为了您的安全和健康,请遵循您所在常规实验室安全规定。
使用说明:
一、 实验前准备
1. 试剂准备:
将试剂盒中的组分A (10× MDC Stain)、组分B (Stain Buffer)、组分C (Wash Buffer)从储存条件 (如-20 ℃/4 °C)取出,平衡至室温 (15-25 °C)。
2. 仪器准备:
荧光显微镜:激发滤光片330-350 nm(如DAPI滤片);发射滤光片510-530 nm(如FITC滤片);
3. 细胞准备:
根据实验设计,对细胞进行相应的处理(如药物诱导、饥饿诱导等)。
4. 对照组设置:
| 组别 | MDC | 样品细胞 | | 空白对照 | - | 不做任何处理 | | 阴性对照 | + | 不做任何处理 | | 阳性对照 | + | 自噬诱导细胞 | | 实验组 | + | 实验组细胞 |
|
(1) 空白对照:未染色细胞,用于评估细胞自发荧光。
(2) 阴性对照:未进行自噬诱导的染色细胞,作为基础自噬水平。
(3) 阳性对照:使用EBSS (Earle’s Balanced Salt Solution)饥饿处理细胞以诱导自噬,建议初次实验时在37 °C下孵育30 min-4 h并设置时间梯度,以确定最佳诱导时间。
注:阳性对照中EBSS缺乏氨基酸和血清,可模拟“饥饿状态”,是细胞自噬研究中常用的阳性对照诱导方法。
注:不同细胞系对自噬诱导的敏感性存在差异,请根据具体细胞类型优化处理时长。如部分非神经元细胞 (如HeLa、HEK293)在EBSS处理30 min后即可观察到自噬激活,但具体响应时间应结合实验检测手段评估。
二、 操作步骤
方案一:荧光显微镜检测 (适用于悬浮细胞)
1. 收集与洗涤细胞:
(1) 收集待测悬浮细胞悬液至离心管中。
(2) 1000 rpm,室温离心5 min,小心吸弃上清液。
(3) 加入适量组分C (Wash Buffer)轻柔重悬细胞。
2. 细胞重悬与计数:
细胞计数,取1×10⁵个细胞,1000 rpm低速离心5 min,去除上清。
注:显微镜法对细胞密度要求不严格,只要实验组与对照组密度一致即可 (推荐范围:10⁵‑10⁷ cells/mL))。具体可根据样本种类与实验条件灵活调整,以显微镜下视野中细胞分布清晰可辨为宜。
注:组分B (Stain Buffer)为我司自主创新的染色缓冲液,配方经多重优化,可在检测期间持续维持细胞生理状态并提供基础营养,并显著提升染料稳定性。若样本类型差异导致用量不足,可直接用PBS、HBSS等常规缓冲液补足体积重悬,不影响检测结果。
3. 细胞染色:
(1) 加入90 μL组分B (Stain Buffer),并加入10 μL组分A (10× MDC Stain),轻轻吹打混匀 (此时MDC Stain 终浓度为1×)。
(2) 37 °C避光孵育15 min,孵育时长可根据实际观察到的染色效果进行灵活调整,调整区间为10-60 min。注:各染料的使用量可以根据不同的细胞种类、预实验或实验条件设置的使用量进行调整。
4. 洗涤与重悬:
(1) 孵育结束后,1000 rpm,室温离心 5 min,收集细胞。
(2) 小心吸弃含染料的上清液 (此为废液,需妥善处理)。
(3) 加入100 μL组分C (Wash Buffer)轻柔重悬细胞,进行洗涤。重复此洗涤步骤共3次,以充分去除未结合的游离染料,降低背景。
(4) 末次洗涤后,彻底吸净上清液,加入100 μL组分C重悬细胞,制成待测样品。
5. 显微镜观察与拍照:
(1) 96孔板法:将100 μL细胞悬液加入96孔板中,静置片刻,待细胞自然沉降贴底后,置于荧光显微镜下观察。
(2) 载玻片法:取20-30 μL细胞悬液滴加于洁净载玻片上,轻轻盖上盖玻片,避免产生气泡,置于荧光显微镜下观察。
(3) 在预设的滤光片条件下,寻找并拍摄绿色点状或囊泡状荧光 (即自噬体/自噬溶酶体)。
方案二:荧光显微镜检测 (适用于贴壁细胞)
1. 细胞清洗:
(1) 直接在培养板中吸弃细胞培养液。
(2) 根据培养板规格,加入对应体积的组分C (Wash Buffer)轻柔洗涤细胞一次 (例如:96孔板加100 μL/孔,48孔板加150 μL/孔,24孔板加250 μL/孔,12孔板加500 μL/孔,6孔板加1 mL/孔)。洗涤后吸净组分C。
2. 制备染色工作液:
根据样品孔数,按组分A: 组分B=1: 9的比例,提前在避光条件下配制MDC染色工作液 (现用现配)。例如,为1个96孔板染色,需配制10 mL工作液 (1 mL组分A + 9 mL组分B)。
3. 细胞染色:
(1) 向各孔中加入对应体积的MDC染色工作液 (体积同步骤1,例如:96孔板加100 μL/孔,48孔板加150 μL/孔,24孔板加250 μL/孔,12孔板加500 μL/孔,6孔板加1 mL/孔)。
(2) 37 °C避光孵育15 min,孵育时长可根据实际观察到的染色效果进行灵活调整,调整区间为10-60 min。注:各染料的使用量可以根据不同的细胞种类、预实验或实验条件设置的使用量进行调整。
4. 洗涤:
(1) 孵育结束后,吸弃各孔中的染色工作液。
(2) 按步骤1的体积,加入组分C (Wash Buffer)洗涤细胞。重复此洗涤步骤共3次,每次都要彻底吸净洗涤液。
5. 显微镜观察与拍照:
(1) 末次洗涤后,每孔加入对应体积的组分C,以保持细胞湿润。
(2) 直接将培养板置于荧光显微镜下观察和拍照。滤光片设置同方案一。
三、 结果判读:
定性分析(显微镜):

图1. MDC 染色效果图
验证Ato能否促进OB-6细胞自噬,设置空白对照组、Dex组、Dex+Ato组排除单一成分干扰,其中Dex (1.0 μM)、Ato (0.1 μM),经MDC探针孵育。在荧光显微镜下,细胞质中呈现绿色点状或囊泡状的荧光信号即为自噬体或自噬溶酶体,结果表明 Ato 可促进细胞自噬。
注:图片引自《Atorvastatin Upregulates microRNA-186 and Inhibits the TLR4-Mediated MAPKs/NF-κB Pathway to RelieveSteroid-Induced Avascular Necrosis of the Femoral Head. Front Pharmacol)(doi:10.3389/fphar.2021.583975.)
注:MDC是含有氨基的酸性染料,MDC亦可标记其它酸性细胞器,正常细胞存在基础背景荧光,结果分析时需设对照。
常见疑问与解答:
1. 问:对于贴壁细胞,胰酶消化是必须的吗?胰酶消化多久算“不过度”?有没有更温和的替代方案?
答:是的,室温下0.25%胰酶30-60 s轻摇即可脱落,>2 min易诱导应激性自噬假阳性。
a. 细胞刮刀:对于贴壁牢固的细胞,可以直接用细胞刮刀在冰上轻轻刮下,然后用缓冲液收集。此方法更温和,但可能得到一些细胞团块,需通过吹打或滤网 (如40 μm细胞筛)制成单细胞悬液。
b. 非酶解细胞分离液:市面上有基于EDTA或特殊缓冲液的细胞分离液,可以不依赖蛋白酶而使细胞脱落,对细胞表面结构影响更小,是研究自噬等细胞活动时的更优选择。
2. 问:细胞在染色和洗涤过程中 (尤其是贴壁细胞方案)大量脱落,该如何解决?
答:通常发生在细胞状态不佳或本就贴壁不牢的情况下 (如诱导自噬后)。
a. 事先加固:在接种细胞前,用多聚赖氨酸、鼠尾胶原或明胶溶液处理培养板/玻片表面,增强细胞的贴壁能力。
b. 全程轻操作:所有加液、吸液动作务必轻柔,避免液体直接冲击细胞层。洗涤时,将液体沿孔壁缓慢加入,吸液时枪头尖端避开细胞层。
3. 问:MDC染色时间 (10-60 min)应该如何精确选择?
答:这是一个需要优化的参数。时间过短可能导致信号弱,时间过长则可能增加非特异性染色和背景。建议做法:在正式实验前,先用阳性对照细胞 (EBSS饥饿处理)做一个时间梯度实验 (如 30,45,60,90,120 min设置5-6个时间点梯度),通过显微镜观察或流式检测,选择信噪比最高 (即阳性信号最强,背景最低)的时间点作为后续实验的标准染色时间。
4. 问:为什么流式细胞术方案中只洗涤1次,而显微镜方案要洗涤3次?
答:显微镜:是直接成像,任何残留的游离染料都会在视野中形成均匀的背景荧光,严重干扰对点状自噬体信号的观察。因此需要严格洗涤 (3 次)以最大化信噪比。
流式细胞仪:检测的是单个细胞通过激光时产生的瞬时荧光信号。仪器可以通过阈值设定,排除掉大部分游离染料颗粒 (其大小和复杂度与细胞不同)。因此,1次洗涤通常足以去除大部分背景,同时能更好地保留已结合的MDC荧光信号,操作也更快捷。
5. 问:流式上机前,用500 μL组分C重悬,这个体积是固定的吗?
答:不是固定的。这个体积的目的是获得一个适合上机检测的细胞浓度。
a. 浓度过低:会导致上机时间过长,数据统计量不足。
b. 浓度过高:容易造成细胞堵塞流式管路,且细胞重叠率增加,影响数据准确性。
c. 建议:最终重悬后的细胞浓度应在2-5×10⁵ cells/mL 左右。因此,如果起始细胞量是1×10⁵个,用500 μL 重悬是合适的 (即2×10⁵ cells/mL)。如果细胞量多,可相应增加重悬体积。
6. 问:MDC染完能固定吗?
答:不建议用醛类固定,会淬灭荧光。MDC是与自噬体膜脂质弱结合的疏水探针,醛类固定剂会使膜蛋白交联、脂质重排,导致染料被“挤”出来,荧光强度下降30-70%。
a. 固定后若再做通透 (TritonX-100等),信号几乎消失。
b. 固定液 pH 与渗透压不当,还会造成自噬泡肿胀或破裂,形态失真。
c. 若必须固定,建议2-4%多聚甲醛 (PFA),PBS配制,pH 7.2-7.4;室温固定≤15 min;固定后立即PBS清洗3次,减少游离醛残留。
d. 注意:固定完尽快 (1 h 内)上机或拍照,避免继续淬灭。
7. 问:染色结果过强或过弱,可能是什么原因?如何调整?
答:染色过强通常是由于MDC染色时间过长,导致染料非特异性结合细胞内酸性结构 (如溶酶体)。可适当缩短染色时间,并严格控制孵育时间,避免超时。染色过弱则可能由染色时间不足、MDC染色液因光照或存放过久发生淬灭 (MDC对光极敏感,易分解)引起。可适当延长染色时间;染色液需现配现用,配制和存放时全程避光;若试剂盒存放超过保质期或出现颜色变化,建议更换新试剂盒。
8. 问:阴性对照染色强度高,背景干扰大,该如何排查?
答:阴性对照染色强度高可能与操作步骤不规范 (如洗涤次数不足、染色时间过长)或阳性对照设置不当有关。建议严格遵循洗涤步骤,确保MDC染色后至少洗涤3次或更多,以彻底清除残留染料。同时,核对检测仪器参数,确保激发波长应设置为335 nm (允许误差范围±10 nm),发射波长应设置为512 nm (允许误差范围±10 nm),若仪器无335 nm激发选项,可选择355 nm作为替代,但需注意背景可能略有升高;并设置阳性对照 (如经EBSS 诱导30min-4h 的细胞)和空白对照,通过对比验证阴性对照的可靠性。
9. 问:没有观察到预期的荧光,可能是什么原因?如何解决?
答:未观察到预期荧光可能与操作步骤错误、激发光设置不正确或阳性对照设置不当有关。建议仔细核对并确保激发光波长正确,严格按照操作步骤执行实验,并确认阳性对照的设置是否合理 (如使用EBSS诱导的细胞)。
Autophagy Green Detection Kit (MDC Method) is a fluorescence staining kit for detecting cellular autophagy. This kit employs the fluorescent probe Monodansylcadaverine (MDC), an acidophilic dye that binds specifically to lipids on autophagosome membranes via ion-trapping effects. It rapidly and selectively accumulates in autophagic vesicles (autophagosomes) in living cells and emits bright green fluorescence, enabling direct visual evaluation of autophagic activity in in vitro cultured cell models. Compared with traditional autophagy detection methods, this kit has prominent advantages: no transfection is required, and rapid detection can be achieved by direct fluorescence staining; MDC shows high specificity for autophagosomes. Note: MDC may also label other acidic organelles, and normal cells exhibit basal background fluorescence. Therefore, control groups must be set for result analysis.
Autophagy is a highly evolutionarily conserved intracellular catabolic pathway. By forming double-membraned autophagosomes, it sequesters and delivers damaged organelles, misfolded proteins, and invasive pathogens to lysosomes for degradation and recycling. This pathway is not only a core mechanism for cells to obtain energy, maintain survival, differentiation, and homeostasis under adverse conditions such as starvation and oxidative stress, but also plays a vital role in organismal growth and development, immune responses, and environmental adaptation. Dysregulation of autophagy is closely associated with major pathological processes including tumors, neurodegenerative diseases, metabolic diseases, pathogen infections, and aging. Given its dual core roles in physiology and pathology, accurate and efficient monitoring of cellular autophagic activity has become an indispensable key step and cutting-edge hotspot in modern life science and medical research.
Application
Real-time observation of changes in autophagic activity in living cells;
Routine autophagy detection without a transfection platform;
Screening and semi-quantitative analysis of autophagic activity under conditions such as drugs, nutrients, hypoxia, and oxidative stress;
Combined studies with apoptosis, necrosis, cell cycle, and other assays;
Product Features
1. Rapid assay: Imaging can be performed after 10 minutes of staining, with results available on the same day, saving 1-2 days compared with traditional transfection methods.
2. Simple operation: No transfection required; direct staining of living cells without transfection or stable cell line construction.
3. Wide applicability: Suitable for hard-to-transfect cells such as primary cells.
4. Low-toxic real-time detection: In situ staining of living cells with MDC, no fixation/permeabilization damage, allowing continuous tracking of autophagic dynamics.
5. High sensitivity: Acidophilic MDC targets autophagosomes/lysosomes, with distinct punctate fluorescent signals.
Product Parameters
Ex/Em: 335 nm / 512 nm
Kit Components
| C1520234 | Component | 100 T | Storage | | C1520234A | 10× MDC Stain | 1 mL | -20℃. Store in the dark. | | C1520234B | Stain Buffer | 50 mL | 2-8℃. | | C1520234C | Wash Buffer | 100 mL | 2-8℃. |
|
Note: 100 T refers to the total number of wells detectable for adherent cells using Component A in a 96-well plate under fluorescence microscopy.
Precautions
1. MDC Stain is potentially toxic. Personnel must wear lab coats and disposable gloves during operation; additional protective equipment such as goggles may be worn if necessary to avoid direct contact of the reagent with skin, mucous membranes, and eyes.
2. Protect from light: MDC is highly light-sensitive. Minimize light exposure during all procedures and reduce the time reagents are exposed to strong light.
3. Set normal cell control groups to compare fluorescence intensities between drug-treated groups and controls to determine whether autophagy is induced or inhibited. Eliminate interference from non-specific staining and further validate results with autophagy-related markers.
4. This product is only for fluorescence staining detection of autophagy in cultured cells or tissues. It cannot be used for frozen cells/tissues or fixed cells/tissue sections.
5. This product is for research use only and must not be stored in ordinary residential premises.
6. For your safety and health, please follow general laboratory safety regulations.
Instructions for Use
I. Pre-Experiment Preparation
1. Reagent Preparation
Remove Component A (10× MDC Stain), Component B (Stain Buffer), and Component C (Wash Buffer) from storage (-20℃/4℃) and equilibrate to room temperature (15–25℃).
2. Instrument Preparation
Fluorescence microscope: excitation filter 330-350 nm (e.g., DAPI filter); emission filter 510–530 nm (e.g., FITC filter).
3. Cell Preparation
Treat cells accordingly based on experimental design (e.g., drug induction, starvation induction).
4. Control Group Setup
| Group | MDC | Sample Cell | | Blank Control | - | Untreated cells | | Negative Control | + | Untreated cells | | Positive Control | + | Autophagy-induced cells | | Experimental Group | + | Experimentally treated cells |
|
(1) Blank Control: Unstained cells for assessing cellular autofluorescence.
(2) Negative Control: Stained cells without autophagy induction, representing basal autophagy levels.
(3) Positive Control: Induce autophagy by starving cells in EBSS (Earle’s Balanced Salt Solution). For initial experiments, incubate at 37℃ for 30 min–4 h with a time gradient to determine optimal induction duration.
Note: EBSS lacks amino acids and serum, mimicking starvation; it is a standard positive control method in autophagy research. Sensitivity to autophagy induction varies by cell line. Optimize treatment duration accordingly. Some non-neuronal cells (e.g., HeLa, HEK293) show autophagy activation after 30 min of EBSS treatment; exact response time should be evaluated by detection method.
II. Protocol
Protocol A: Fluorescence Microscopy (Suspension Cells)
1. Cell collection and washing
(1) Collect suspension cells into centrifuge tubes.
(2) Centrifuge at 1000 rpm for 5 min at room temperature; carefully discard supernatant.
(3) Add appropriate Component C (Wash Buffer) and gently resuspend cells.
2. Resuspension and counting
Count cells, take 1×10⁵ cells, centrifuge at 1000 rpm for 5 min, remove supernatant.
Note: Cell density is flexible as long as test and control groups are consistent (recommended: 10⁵-10⁷ cells/mL). Adjust for clear cell distribution under microscopy.
Note: If Component B is insufficient, PBS or HBSS may be used without affecting results.
3. Cell staining
(1) Add 90 μL Component B and 10 μL Component A (final concentration 1×); mix gently.
(2) Incubate at 37℃ for 15 min in the dark (adjustable 10-60 min based on staining efficiency).
4. Washing and resuspension
(1) After incubation, centrifuge at 1000 rpm for 5 minutes at room temperature to harvest the cells.
(2) Carefully aspirate and discard the dye-containing supernatant (this is waste liquid and should be disposed of properly).
(3) Add 100 μL of Component C (Wash Buffer) and gently resuspend the cells for washing. Repeat this washing step a total of 3 times to sufficiently remove unbound free dye and reduce background.
(4) After the final wash, completely aspirate the supernatant, add 100 μL of Component C to resuspend the cells, and prepare the sample for testing.
5. Microscopic observation and imaging
(1) 96-well plate method: Add 100 μL of cell suspension to a 96-well plate, let stand briefly until the cells naturally settle and attach to the bottom, then observe under a fluorescence microscope.
(2) Slide method: Pipette 20-30 μL of cell suspension onto a clean glass slide, gently cover with a coverslip to avoid air bubbles, and observe under a fluorescence microscope.
(3) Under preset filter conditions, locate and capture images of green punctate or vesicular fluorescence (i.e., autophagosomes/autolysosomes).
Protocol B: Fluorescence Microscopy (Adherent Cells)
1. Cell Washing
(1) Aspirate and discard the cell culture medium directly from the culture plate.
(2) Add an appropriate volume of Component C (Wash Buffer) according to the culture plate format to gently wash the cells once (e.g., 100 μL/well for 96‑well plates, 150 μL/well for 48‑well plates, 250 μL/well for 24‑well plates, 500 μL/well for 12‑well plates, 1 mL/well for 6‑well plates). Completely aspirate
2. Component C after washing.
Preparation of Staining Working SolutionPrepare MDC staining working solution at a ratio of Component A : Component B = 1:9 under light‑protected conditions in advance, based on the number of sample wells (prepare fresh before use). For example, to stain one 96‑well plate, prepare 10 mL of working solution (1 mL Component A + 9 mL Component B).
3. Cell Staining
(1) Add the corresponding volume of MDC staining working solution to each well (same volume as in Step 1; e.g., 100 μL/well for 96‑well plates, 150 μL/well for 48‑well plates, 250 μL/well for 24‑well plates, 500 μL/well for 12‑well plates, 1 mL/well for 6‑well plates).
(2) Incubate at 37 °C for 15 min in the dark. The incubation duration can be flexibly adjusted from 10 to 60 min according to the actual staining performance observed.Note: The dosage of each dye can be adjusted according to different cell types, preliminary experiments, or experimental conditions.
4. Washing
(1) After incubation, aspirate and discard the staining working solution from each well.
(2) Add Component C (Wash Buffer) at the same volume as in Step 1 to wash the cells. Repeat this washing step 3 times, and completely aspirate the wash buffer each time.
5. Microscopic Observation and Imaging
(1) After the final wash, add the corresponding volume of Component C to each well to keep the cells moist.
(2) Observe and image the culture plate directly under a fluorescence microscope. Filter settings are the same as in Protocol A.
III. Result Interpretation
Qualitative Analysis (Microscopy)
Figure 1. MDC Staining Image
To verify whether Ato can promote autophagy in OB‑6 cells, a blank control group, Dex group, and Dex+Ato group were set up to exclude interference from single components. Dex (1.0 μM) and Ato (0.1 μM) were used, followed by incubation with the MDC probe. Under a fluorescence microscope, green punctate or vesicular fluorescent signals in the cytoplasm represent autophagosomes or autolysosomes. The results indicate that Ato can promote cellular autophagy.
Note: Image reproduced from Atorvastatin Upregulates microRNA‑186 and Inhibits the TLR4‑Mediated MAPKs/NF‑κB Pathway to Relieve Steroid‑Induced Avascular Necrosis of the Femoral Head. Front Pharmacol (doi:10.3389/fphar.2021.583975.)
Note: MDC is an acidic dye containing an amino group. MDC may also label other acidic organelles, and normal cells exhibit basal background fluorescence. Control groups must be included for result analysis.
Frequently Asked Questions
Q1: Is trypsinization necessary for adherent cells? How long is considered “non‑excessive” trypsinization? Are there gentler alternatives?
A: Yes. Gentle agitation with 0.25% trypsin at room temperature for 30-60 seconds is sufficient for cell detachment. Digestion longer than 2 minutes may easily induce false‑positive stress autophagy.
a. Cell scraper: For firmly adherent cells, they can be gently scraped off on ice using a cell scraper and collected with buffer. This method is gentler but may produce cell clumps, which require pipetting or filtration (e.g., through a 40 μm cell strainer) to obtain a single‑cell suspension.
b. Non‑enzymatic cell dissociation solution: Commercially available dissociation solutions based on EDTA or special buffers can detach cells without proteases, cause less damage to cell surface structures, and are preferred for studying cellular processes such as autophagy.
Q2: How to resolve excessive cell detachment during staining and washing (especially in the adherent cell protocol)?
A: This usually occurs in cells with poor viability or weak adherence (e.g., after autophagy induction).
a. Pre‑coating: Treat culture plates or slides with poly‑L‑lysine, rat tail collagen, or gelatin before cell seeding to enhance cell attachment.
b. Gentle handling: All liquid addition and aspiration must be performed gently to avoid direct impact on the cell layer. Add buffer slowly along the well wall during washing, and keep the pipette tip away from the cell layer when aspirating.
Q3: How to precisely choose the MDC staining time (10-60 min)?
A: This is a parameter requiring optimization. Insufficient staining time may lead to weak signals, while excessive time may increase non‑specific staining and background. Recommendation: Before formal experiments, perform a time‑gradient assay using positive control cells (EBSS starvation treatment) (e.g., 30, 45, 60, 90, 120 min, 5-6 time points). Select the time point with the highest signal‑to‑noise ratio (strongest positive signal, lowest background) via microscopy or flow cytometry as the standard staining time for subsequent experiments.
Q4: Why only one wash in the flow cytometry protocol but three washes in the microscopy protocol?
A: Microscopy involves direct imaging. Any residual free dye produces uniform background fluorescence in the field of view, severely interfering with the observation of punctate autophagosome signals. Therefore, rigorous washing (3 times) is required to maximize the signal‑to‑noise ratio.Flow cytometry detects transient fluorescence signals from single cells passing through a laser. The instrument can exclude most free dye particles (which differ from cells in size and complexity) via gating. Thus, one wash is usually sufficient to remove most background while better preserving bound MDC fluorescence, with simpler and faster operation.
Q5: Is the 500 μL volume of Component C for resuspension before flow cytometry fixed?
A: No. This volume aims to achieve a suitable cell concentration for detection.
a. Too low concentration: Prolongs detection time and results in insufficient statistical data.
b. Too high concentration: Prone to clogging the flow cytometer tubing and increased cell coincidence, affecting data accuracy.
c. Recommendation: The final cell concentration after resuspension should be approximately 2-5×10⁵ cells/mL. Therefore, resuspension in 500 μL is appropriate for an initial cell count of 1×10⁵ (i.e., 2×10⁵ cells/mL). Increase the resuspension volume accordingly for larger cell quantities.
Q6: Can samples be fixed after MDC staining?
A: Aldehyde fixation is not recommended, as it quenches fluorescence. MDC is a hydrophobic probe that weakly binds to autophagosomal membrane lipids. Aldehyde fixatives cause membrane protein crosslinking and lipid rearrangement, displacing the dye and reducing fluorescence intensity by 30-70%.
a. Subsequent permeabilization (e.g., Triton X‑100) after fixation almost eliminates the signal.
b. Improper pH and osmotic pressure of fixative may cause swelling or rupture of autophagic vacuoles and morphological distortion.
c. If fixation is necessary, 2-4% paraformaldehyde (PFA) prepared in PBS at pH 7.2-7.4 is recommended; fix at room temperature for ≤15 min; wash immediately 3 times with PBS after fixation to reduce residual free aldehyde.
d. Note: Perform detection or imaging as soon as possible (within 1 hour) after fixation to avoid further fluorescence quenching.
Q7: What causes overly strong or weak staining, and how to adjust?
A: Overly strong staining usually results from excessively long MDC incubation, leading to non‑specific binding to intracellular acidic structures (e.g., lysosomes). Appropriately shorten the staining time and strictly control incubation duration to avoid overtime.Weak staining may be caused by insufficient staining time or quenching/degradation of MDC stain due to light exposure or prolonged storage (MDC is highly light‑sensitive and prone to decomposition). Appropriately prolong staining time; prepare working solution fresh immediately before use and protect from light throughout preparation and storage; replace the kit if it has expired or shows color changes.
Q8: How to troubleshoot high staining intensity and strong background in the negative control?
A: High background in the negative control may result from non‑standard procedures (e.g., insufficient washing times, excessive staining duration) or inappropriate positive control setup.Strictly follow the washing steps to ensure at least 3 washes after MDC staining to thoroughly remove residual dye. Verify instrument parameters: excitation wavelength set to 335 nm (tolerance ±10 nm), emission wavelength set to 512 nm (tolerance ±10 nm). If 335 nm excitation is unavailable, 355 nm may be used as an alternative, with a slight expected increase in background. Include positive controls (e.g., cells induced with EBSS for 30 min-4 h) and blank controls to verify the reliability of the negative control via comparison.
Q9: Why is the expected fluorescence not observed, and how to resolve it?
A: Failure to observe expected fluorescence may result from incorrect procedures, improper excitation light settings, or inappropriate positive control setup.Carefully verify correct excitation wavelength settings, strictly follow the experimental protocol, and confirm reasonable positive control setup (e.g., using EBSS‑induced cells).


 H2618383


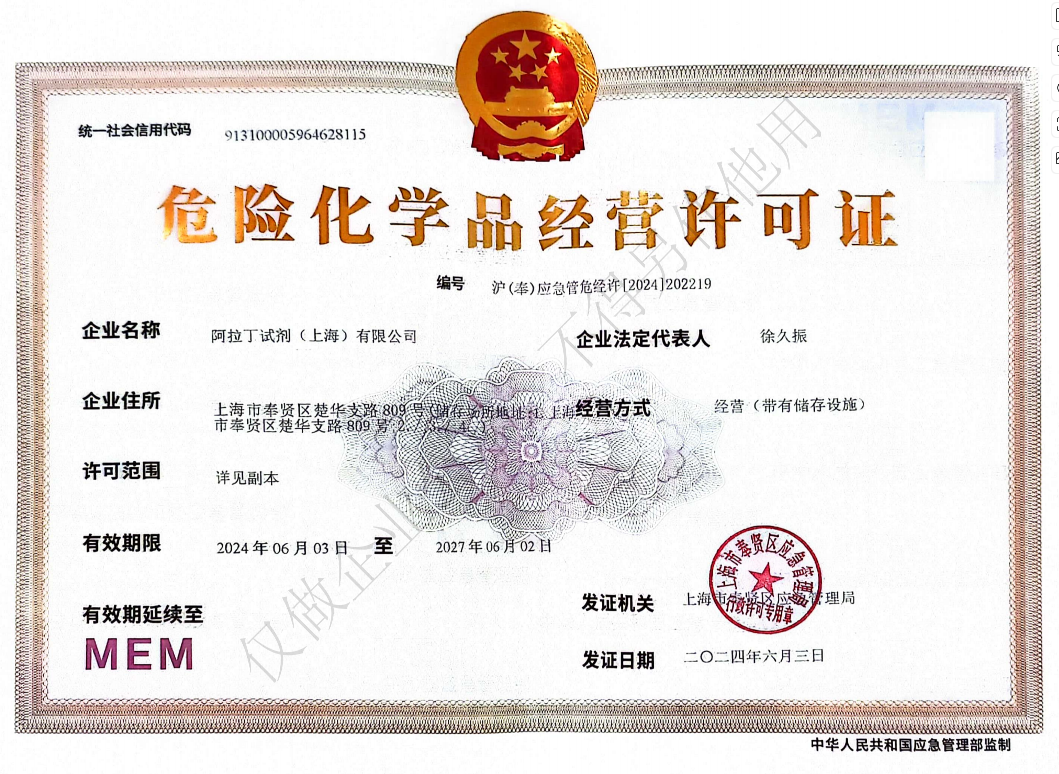 危险品化学品经营许可证(带存储)